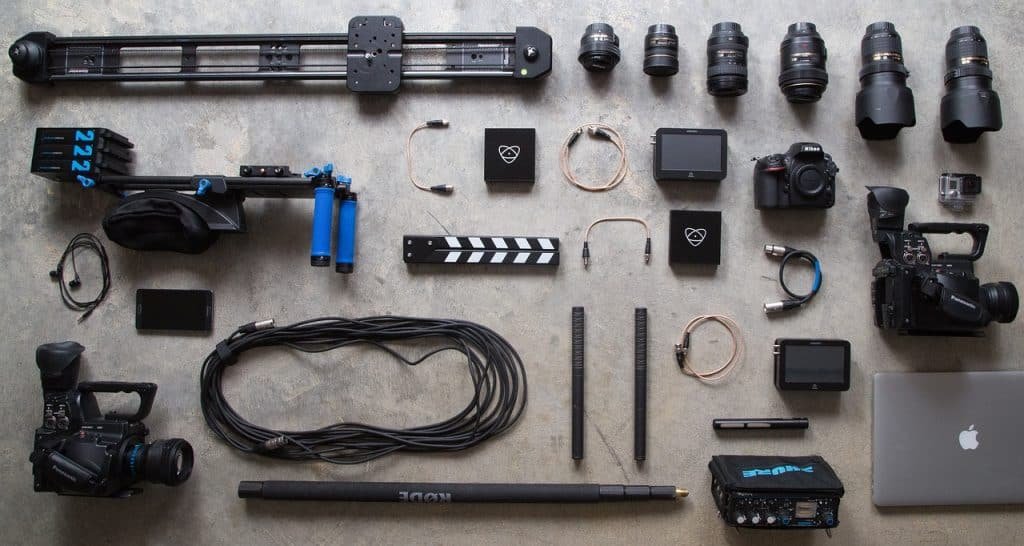
What type of equipment do I use?
Very often I am been asked about the additional gear and equipment that I use for my work.
If you want to learn more about the cameras and lenses I use you can read more about them here.
Before we dive into my world of gear and equipment I must tell you that I am a big believer that gear should be considered like any financial investment.
This means if it works it works, I don’t run after the trend if the equipment does not bring quality value that is worth the investment.
Lighting for Architecture and Interior Photography
Studio Lighting / Strobes
When we talk about lighting in general the 3 main categories are:
- Big Studio / Strobe Lights
- Small on-camera flashes/speed lights
- Continuous lighting.
Studio Lighting / Strobes – This is probably my favorite light to use in 90% of my commercial work. Personally, I work with Profoto B1 and FlashPoint 600 Pro sets (Godox)
They are great to move around while capturing high-end homes, hotels, and lifestyle shoots. A big benefit is when you don’t have cables running around you, your team, and your clients.
Pros: No Cables (less risk), Easy to transport, fits in a backpack, high power and cycle time, Great color production, many accessories, semi-heavy so they sit safely on light stands.
Cons: Heavy if you want to handhold them for a long period of time.
Continues Lighting
There are many options from light “guns” to light sticks, from LED to tungsten to choose from depending on your preferred setup.
Don’t forget that continuous lighting is almost always less powerful than flashes and strobes, meaning you might need to crank up the ISO to compensate for that.
Pros: Great Colour, long-distance, light painting.
Cons: Can’t control light temperature, not strong enough, and expensive for use.
Speed lights / On-Camera Flash
Speed lights (on camera flashes) – I use 3rd party (not Canon originals) speed lights.
I choose the 3rd party for two main reasons, first, they are cheaper and provide almost the same quality as the originals, second, I have 3-To 5 of them in my photography bag and I use them most of the time in a manual setting for environmental lighting.
Pros: They are great to have, cheap, compact can be hidden in corners, easy to carry, and can be used as a backup if needed.
Cons: They are not strong enough to overcome the sunlight or to be used with large modifiers that absorb a lot of light, and the recharge time between high power pops is slow.


Transmitters and Receivers
Controlling Your Cameras
When it comes to camera control.
My preferred choice is the Cam Ranger and the Cam Ranger II.
So why do we use them? for creating a multi-exposure, light painting, and transmitting the images to an iPad/Laptop both for our control and for the client to review the work (monitoring).
The first CamRanger version had some issues in communication but it was a huge game-changer for our industry, Now when the V2 came out we have a more reliable and fast solution. Speed is always better when showcasing to the client on a second monitor.
It also allows you to monitor the staging of the space while doing so yourself or with the client with live preview mode so you don’t have to take pictures running to the camera every minute.
Controlling your Lights
There is no better way to get creative with remote triggers.
Personally use the Profoto and Flash Point / Godox remotes when it comes to flash operations, but any 3rd party flash system has its own triggers and remotes and all of them work great.
I always have a backup remote, just in case one fails, as I rely on lighting for most of my projects and this connects my camera to the lighting in every shoot.
Camera Tripod and Head for Architecture
Camera Tripod
There are endless options to choose from when it comes to tripods.
I use the same Manfrotto aluminum tripod for over 8 years, I didn’t choose the carbon fiber just to have more weight on the tripod making it more sturdy.
You need to take into consideration cases when you do exterior work and the wind picks up, or the movement of people that might shake your camera.
The only recommendation I have is the height of the tripod, I would recommend that your tripod will reach above 5.5ft (170cm) this will help in complex shoots and places when you need to go higher than normal or when you are on a lower point trying to get above ground view.
Camera, and Tripod Head
Like my tripod I use the Manfrotto 410 for over 10 years, it’s sturdy and accurate with two bubbleheads that allow you to do all kinds of images, from pano to 360, and full control to get your pictures straight.
One thing that bothers me in this model is that tilting to the left side because of the knob position can be up to 100%, meaning if you need to compensate for something that is not straight, you will need to adjust the legs of the tripod.


Bags and Cases for Photography Gear
Day-to-Day Bags
When it comes to bags it mostly depends on your setup, amount of cameras, lenses, and accessories.
I like to travel light to work more efficiently and not forget to save space for all my backup equipment as well.
I use a Lowepro backpack for all my photography equipment that includes 2 cameras, 3 lenses, remote controls, and sometimes speed lights or tripod heads when traveling.
The second bag is a rolling bag from Lowepro as well, and there I hold my 2 studio lights and small light adapters, chargers, and cables.
For Traveling:
When traveling for lifestyle work I take the Manfrotto light stands bag that can accommodate 4 stands and use it for 3 stands and folding umbrellas and softboxes.
As well for traveling I take my backpack with the cameras and lenses on the back and roll the second bag (Think Thank Derby 2.0) with the studio equipment to the airplane, sending the stands as baggage.
Yes, it cost extra to bring it on board, but I make sure it’s safe and close by.
Producer and Photographer On Location Monitor
When it comes to controlling the camera depending on the assignment I use my iPhone 13 Pro or my Computer as a shutter releaser.
On small projects, I use my phone for fast working environments and for lifestyle and commercial shoots.
When I have an art director or a client, I use my MacBook Pro or iPad Pro for a larger preview.
When clients require a dedicated viewing station/producer monitor I set up my IPAD on a stand to showcase real-time photos to your client.
Personally, my clients don’t hold my hand when I photograph, but in large projects, the client wants to be “involved,” They like to have the option to sit at the side and review the photos.