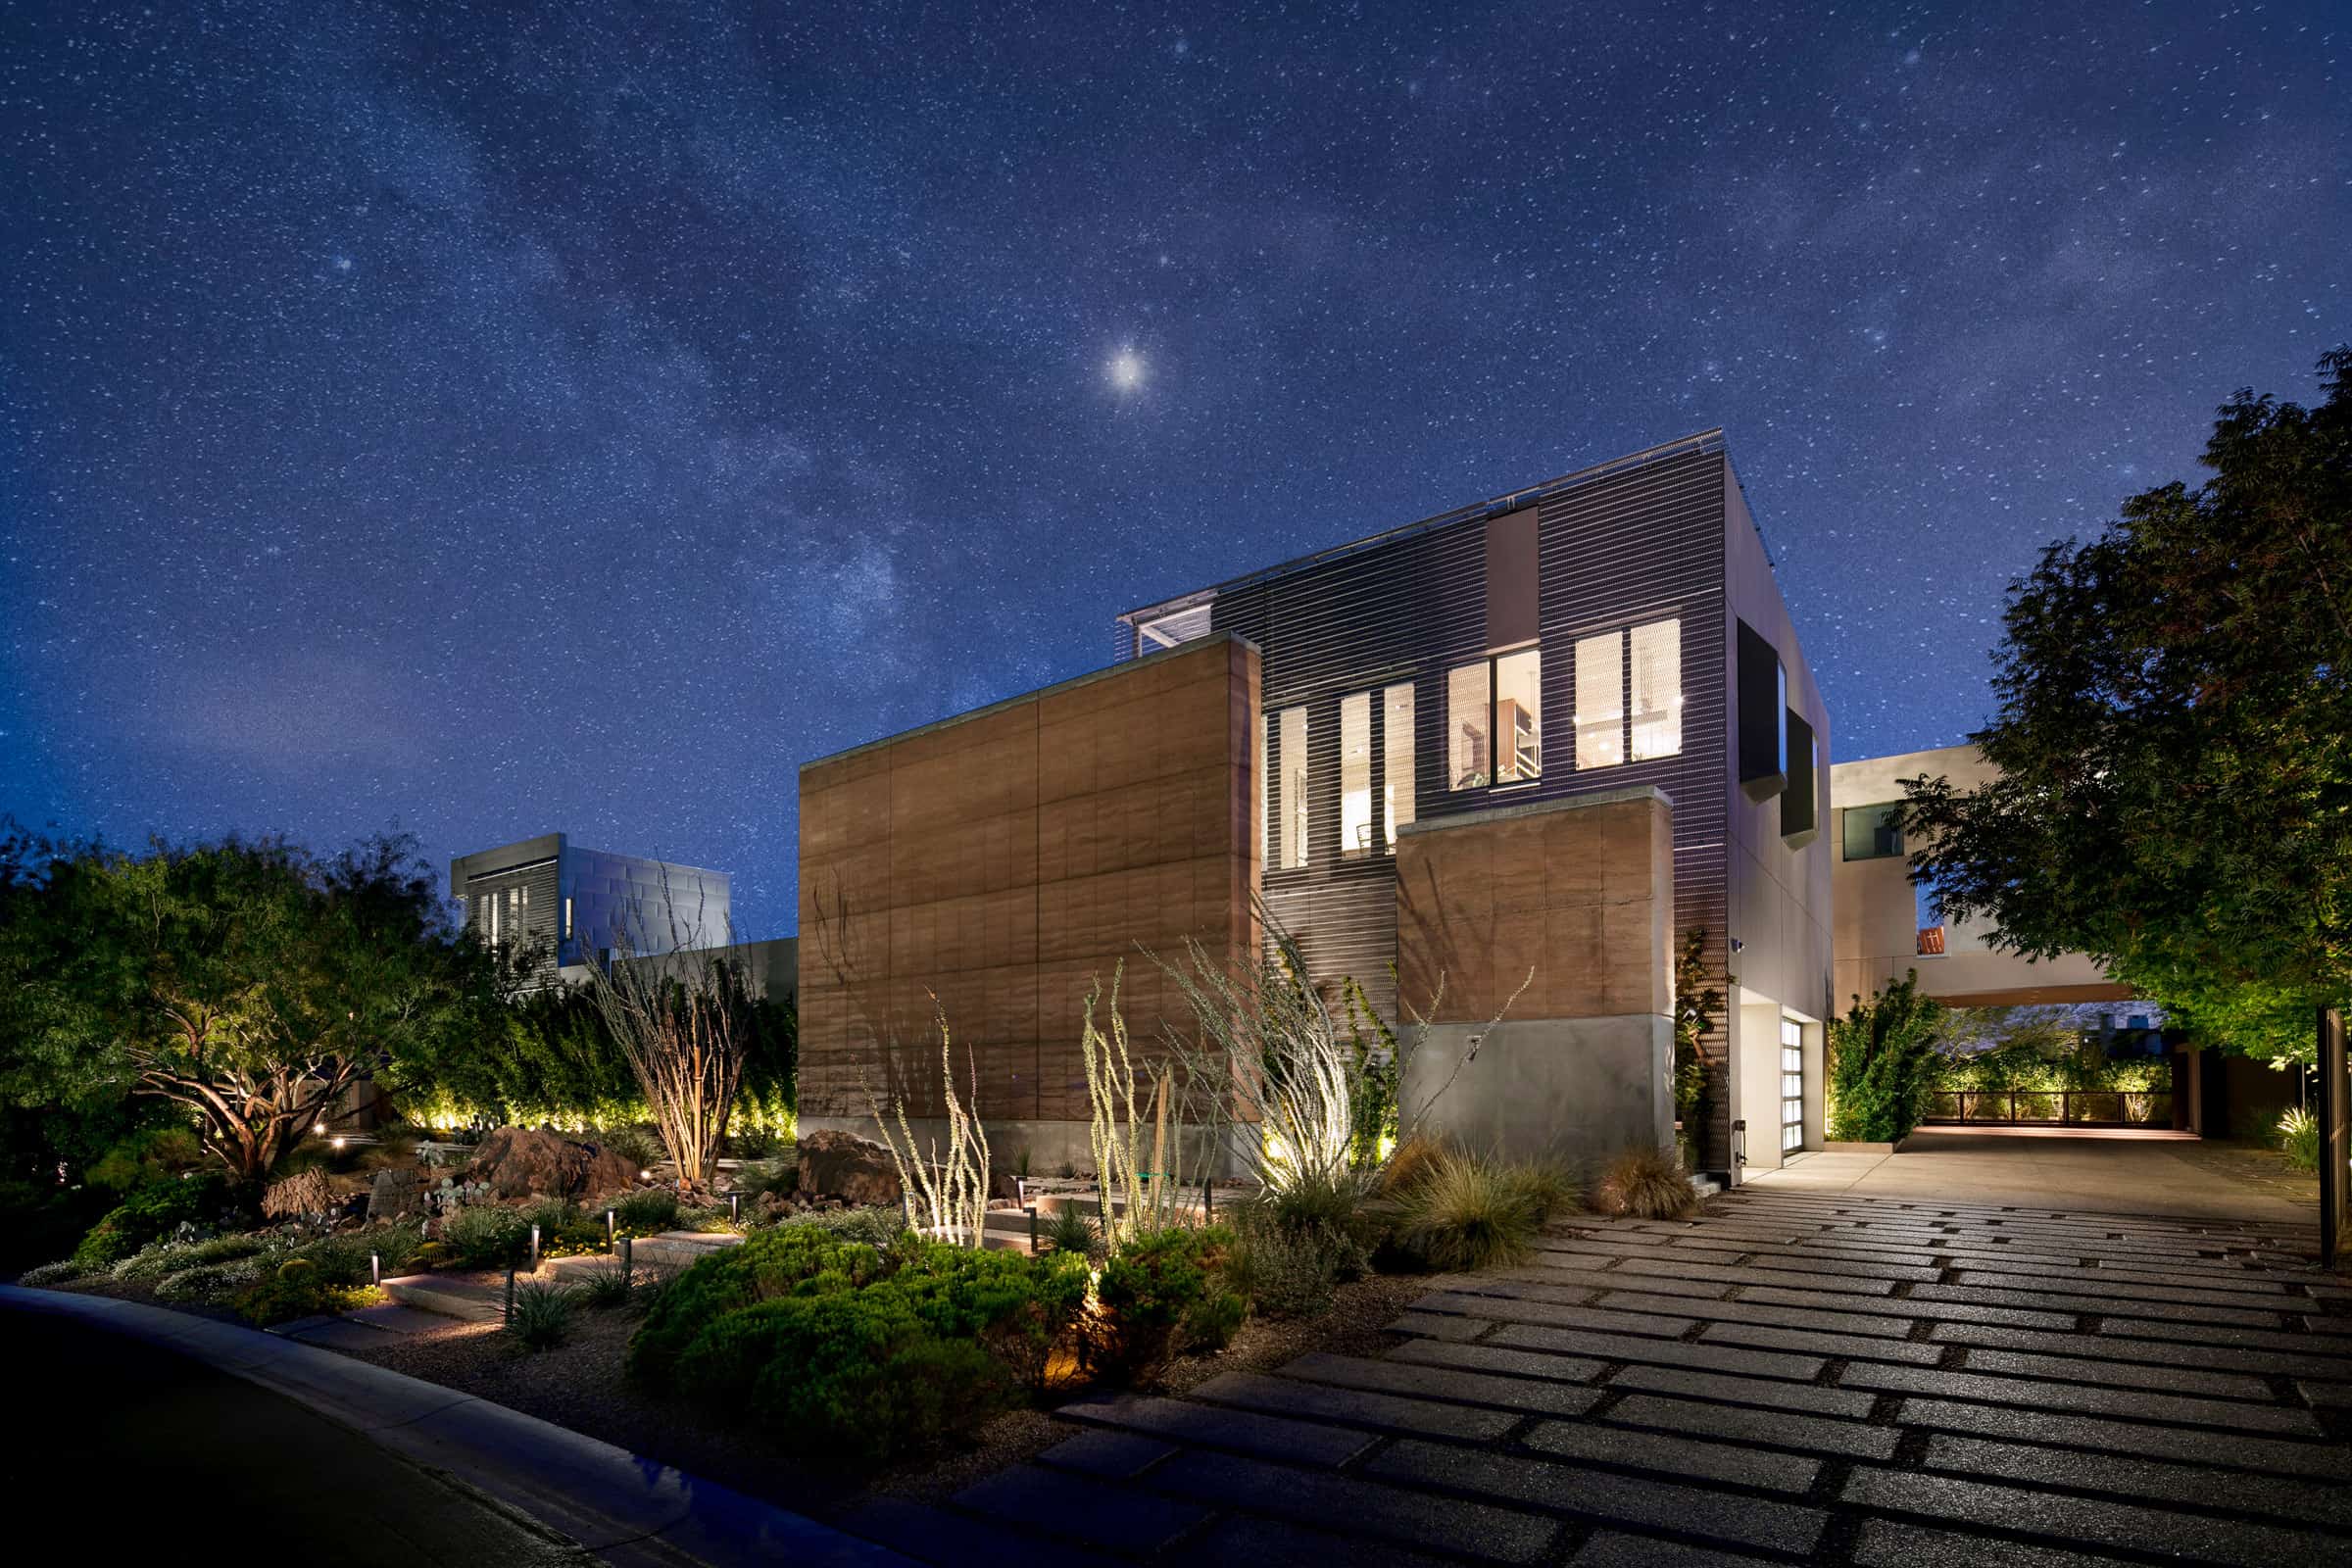
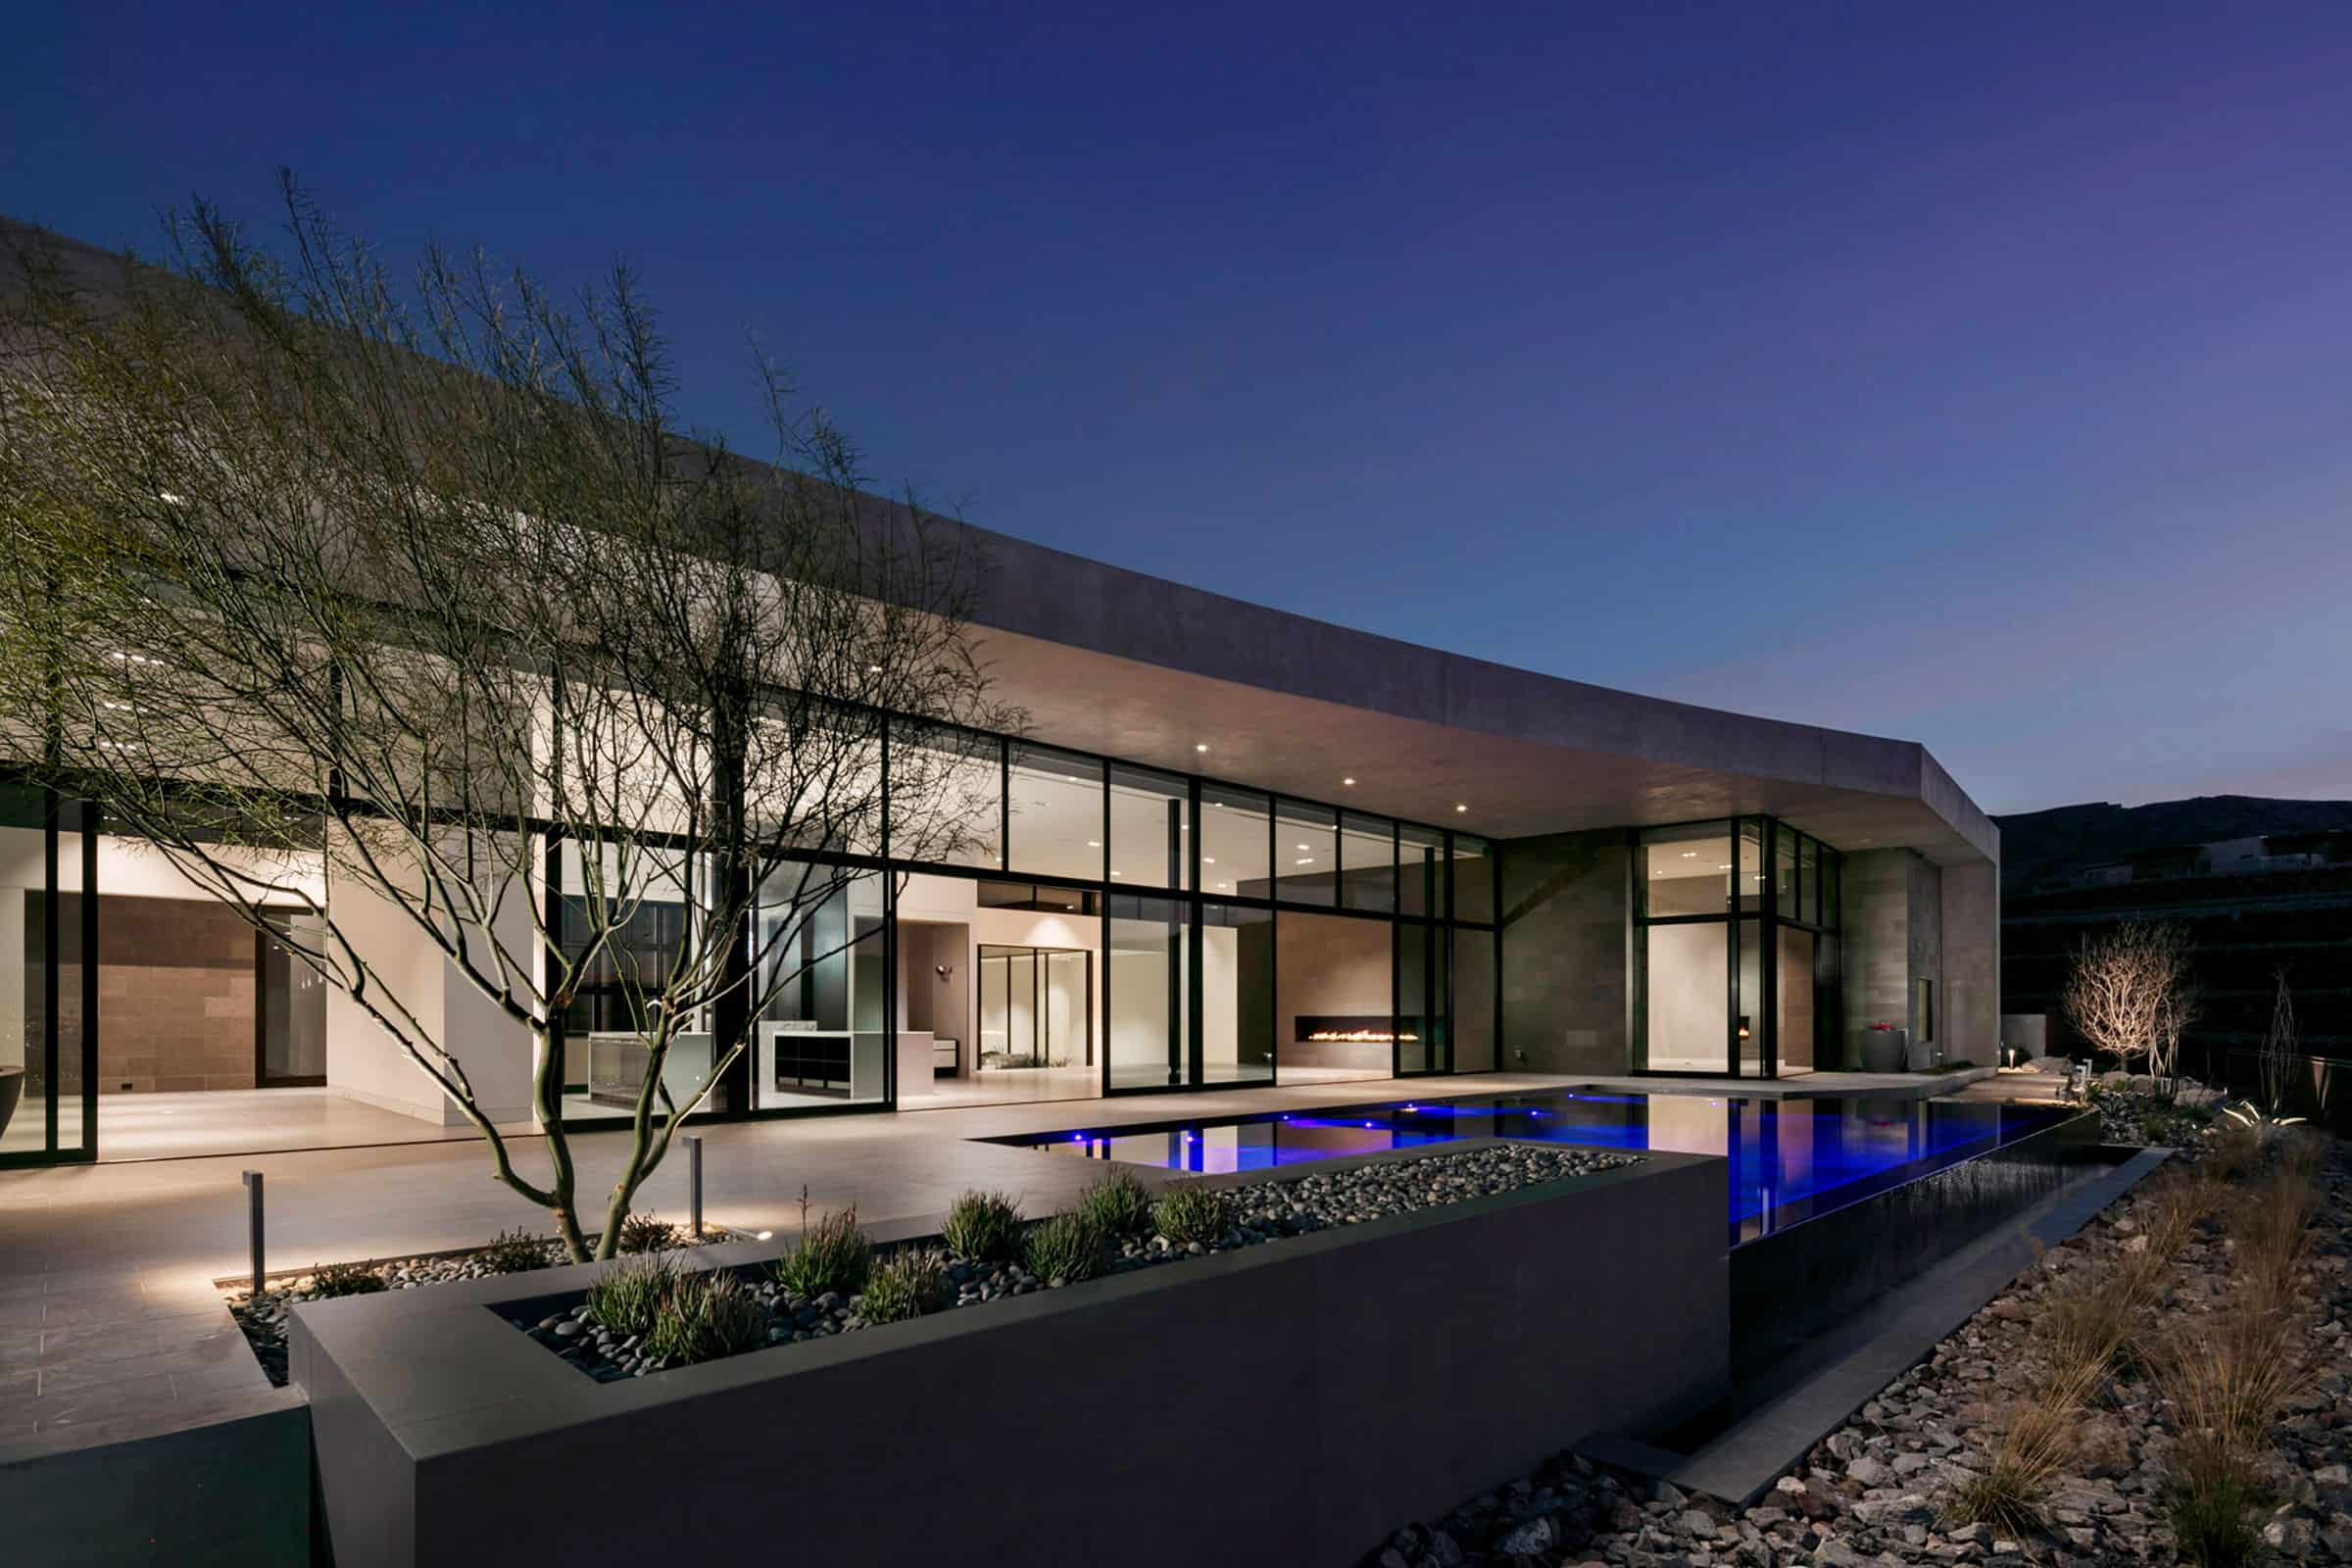
Dusk, Twilight, and Hero Shoot are the most common name for what is typically the last photo of the day.
By far it’s my favorite shot to take because it incorporates the in and out of the space and creates the best hero shoot of the day in many cases.
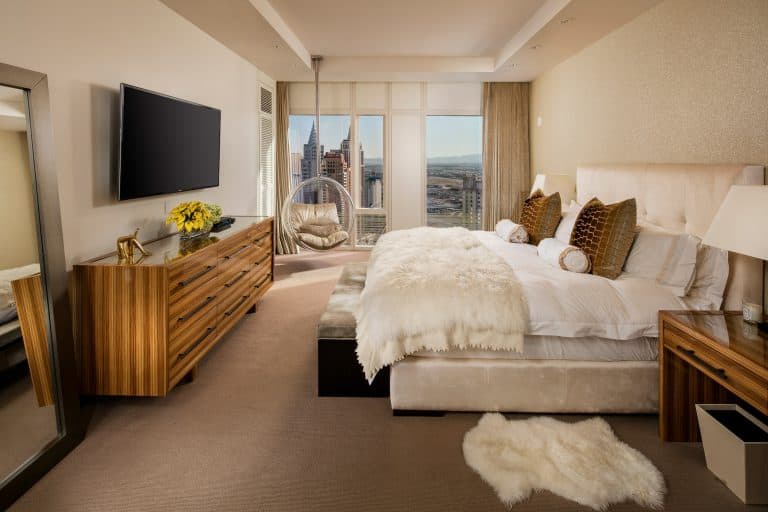
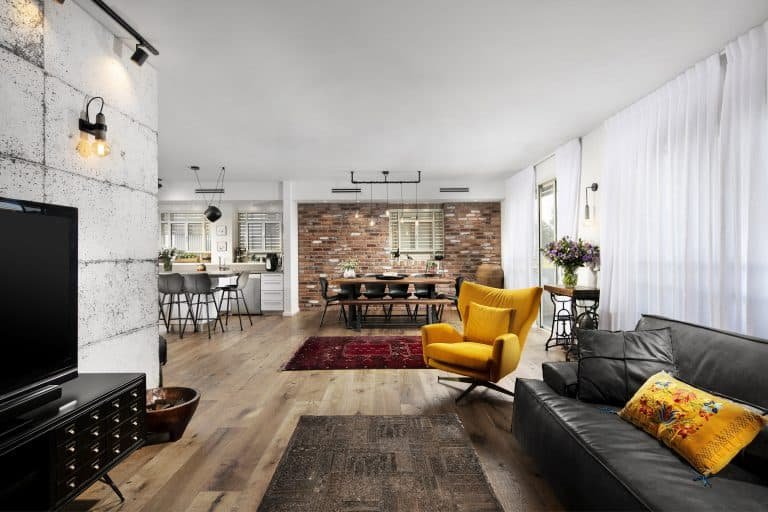
This is great both for real estate and architectural photography and even a great lifestyle image.
It provides also an added value to your and your client’s portfolio and many end up using this as a feature visual or an ad.
Table of Contents
What is a Twilight / Dusk Shoot
It’s simply a shoot you take when the sun is setting and the beautiful thing of light balance happens, this is the time when the indoors shines out as the amount of light outside and inside are getting to a balance point.
If you want to learn more about architecture photographer job, history, rates, and techniques make sure you read our blog.
Planning a Twilight Photo
Planning is key for every successful photoshoot, especially for dusk and twilight. The reason is that you only have a few minutes to capture the “sweet spot” when the lights inside are balanced with the exterior light minutes before the sun has set.
While the sun sets about 15-45 min depending on the season there is a 5 min window for the perfect shoot, this is time-consuming but worth it.
Getting Ready
You need to take into consideration many factors, some places have their exterior light on a timer and it might turn on only when it’s dark, so if you can control it make sure it’s on well before you started the position.
Do they have an irrigation system? Wait, what? Many warm places have their irrigation system set to the night to avoid water vaporizing due to heat, you don’t want the sprinklers running on when you start capturing and being surprised by it (You will thank me later for this).
Removing cars, and garbage bins should be done well ahead, like we said you only have 5 minutes and you don’t want to start running and removing things at the last minute.

Finding the right Angle
Like we said it takes an hour to prepare for a night shoot, and once you are located and taking exposures you can’t move the camera.
Make sure you find the right angle that works for you as you only have one shot to make it happen.
Most of us use multiple exposures with or without lighting to create an impactful visual, meaning we only get one twilight shoot so we can’t re-position the camera during the shoot.
Use a Tripod
When the sun goes down we need to use a long exposure, and preferably a shutter remote to avoid moving the camera during the long exposure.
Having a sturdy tripod is key for successful and sharp images so make sure you balance your tripod and are ready for the shoot.
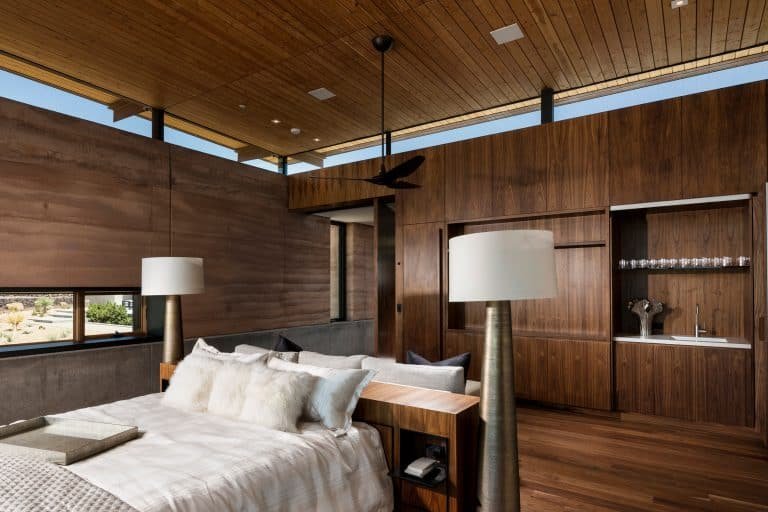
Turning the Interior Lights on
As we often see the entire side of the space when we shoot twilight, it’s important to make sure all the lights are on all floors, all rooms, and even the garage.
Again if you shoot an office, those lights might be automatically on like the exterior so make sure they are manually turned on well before you get to set up your camera.
Don’t wait, Start Capturing
I often use multiple exposures and then combine them, like we said several times you only have a few minutes to capture the perfect shot.
Start by taking images earlier when the sun is still available, you will never know which exposure you will need later to recover shadows or highlights.
Typically we take a shot every 5 min, starting when the sun is set and until it’s completely dark.
Setup a Second Camera
If you have a second camera and a tripod or if you use a timer to shoot every few minutes a frame, a great idea is to set up another camera to get another view.
Many of the newer cameras have a built-in timer so you can set it up again to take a picture every few minutes.
Camera Settings
Well, light is dynamic and your settings should be the same.
The aperture, ISO, and focus remain the same while the exposure changes to accommodate the ambient light.
Your goal is to find the sweet spot when the interior and exterior light are balanced,
Use Flash
I prefer to create additional lighting with strobes or flashes, depending on the situation, it is the same technique for capturing the twilight, but when we finish I add several exposures with light to create some directional lighting.
Manual HDR
Regardless if you do manual or auto HDR (high dynamic range) multiple exposures, it’s always best to have several exposures that you can manually blend later on to enhance the details.
This can be for the shadows, highlights, in or out of the space both with the daytime photo and the last image when the sun has set.
Sky Replacement
We can’t control the sky, and many times changing the sky or what’s called “sky replacement” can help create a better mood and feel.
This is not only for dusk shoots, this can be also done in the daytime.
We always capture great Skys where ever we travel and have our sky library, when we need it we mask out the sky and replace it with a more exciting sky image that match matches our final image.
Color Correction
Skys can be blue or red depending on the sunset, the interior light can be white or warm, we need to take care of two elements in post-production.
Exterior – we will refine the colors, sometimes including changing the hue and color of the Skye from blue or red to a more natural color.
Interior – we also reduce the yellow that comes from the warm light inside of the space and make it more white to balance the overall color in the image.
Pro-Tip
Buy a bicycle led light, you know, those red ones you put behind that blinks for safety.
You can buy two of them for little as 10 euros, and I clip them to the tripod/camera strap and point them towards the back on blinking mode.
Most of the shoots are done from the parking or main street, meaning we are putting ourselves and our gear at risk, as drivers are not expecting to see a camera or a photographer standing in the dark taking pictures.
This will flash and create awareness that there’s a camera standing there and most people would recognize it and be more aware of you and your gear.