It’s not just a form of art, it’s a way to translate images to consumer behavior actions, that sell your work.
This article will include everything you want and need to know about architectural photography, but before we start here is a little about me.
I have been working for over 12 years across international markets in Europe, and the United States.
I bring many years of experience, knowledge, and expertise in many fields from hospitality, architecture, and design to new development, luxury homes, and commercial and retail architecture across Germany, Denmark, Norway, Italy, France, and the rest of the EU region
History
One of the first documented architecture-style visuals on the permanent image was done by Nicephore Niepce.
Throughout history, images of buildings have been a highly valued subject.
In 1920 magazines started commissioning visual artists for work, and by 1930 Margaret Bourke published her first work in House and Garden.
After WWII in the USA, modern architecture became the second name for a better lifestyle, and magazines capitalized on that to reflect the value.
In the 1950s colored pictures became more common and in demand.
in the year 2000, the digitalization of cameras and post-production software became more evolved.
Today the industry shifted to a more commercial approach rather than just an artistic, one due to the rising competition of professionals from all sides of the trade.

Defining The Industry
Today, it is much more than capturing a building or a space, it holds a significant impact on the client’s representation capabilities, and accuracy of work that translates to a selling visual.
A great statement is that we create images, not just take them.
Today many industry professionals such as interior designers, real estate developers, hospitality, and retail use high-impact visuals of spaces to attract new clients across the board.
Architecture Photographers are required to master not only creative imagery but also to be very technical oriented with knowledge in many industries of the design world, visual arts, and most importantly consumer behavior.
In one phrase, someone that can create for your clients the feeling “I want this”, “they want to be there for there and have it”.
The picture must translate the value and usability and it answers their both day-to-day and emotional needs.
Main Challenges
With stunning structures and spaces, many can lose track of the goal of documenting a professional’s work, and the focus is to sell their work.
While we are all artists, at the end of the day if we can’t sell our client’s work to their clients, the visuals beautiful as they are will be just beautiful visuals.
You need to understand, what was the scope of work, the utility, and the use of the space, who will be the client to buy into this experience, and whether Will it be the homeowner.
Maybe a company that is looking for an office building or maybe it’s even a guest that is looking to book their next leisure vacation.
After you understand the use of space and who is the target audience then we combine creativity, an artistic, yet very technical approach to creating an impactful image that tells a story.
We often forget that while both we and the client are familiar with the project in to out, the viewer of the image can’t guess what they don’t see.
Many will say, it’s enough to attract the potential client into a discussion, but in reality, we can’t measure those who haven’t reached out to us to learn more about our business, capabilities, and fees.
The secret of the trade is that you can’t move or position a building where it’s best for the images, the professional must be creative to work in the existing environment.
The conception that clients will contact us because we are amazingly talented people is false.
Your client has several seconds to be captured by your pictures, if they don’t tell a story they will never take the time to read your About page, to learn what you can do for them.

Market Segmentation
Architecture
Architects come in “many shapes and forms” some specialize in commercial spaces and some in residential.
While we mostly focus on architecture, it’s important to tie the environment and the design together as a whole.
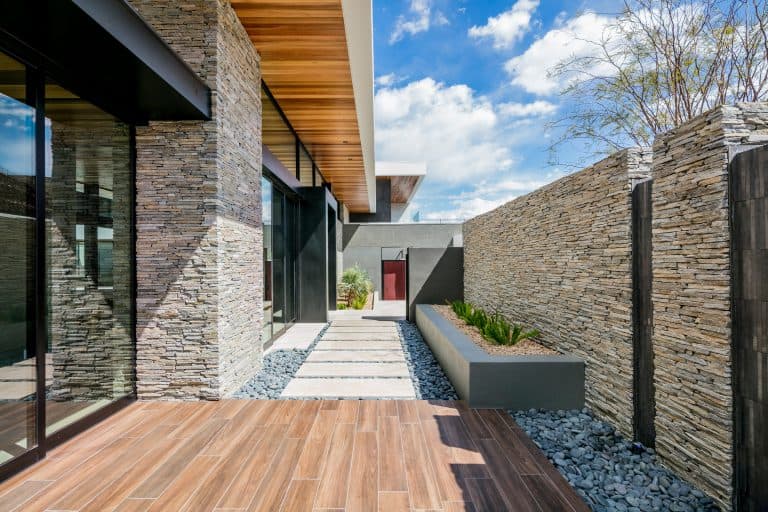
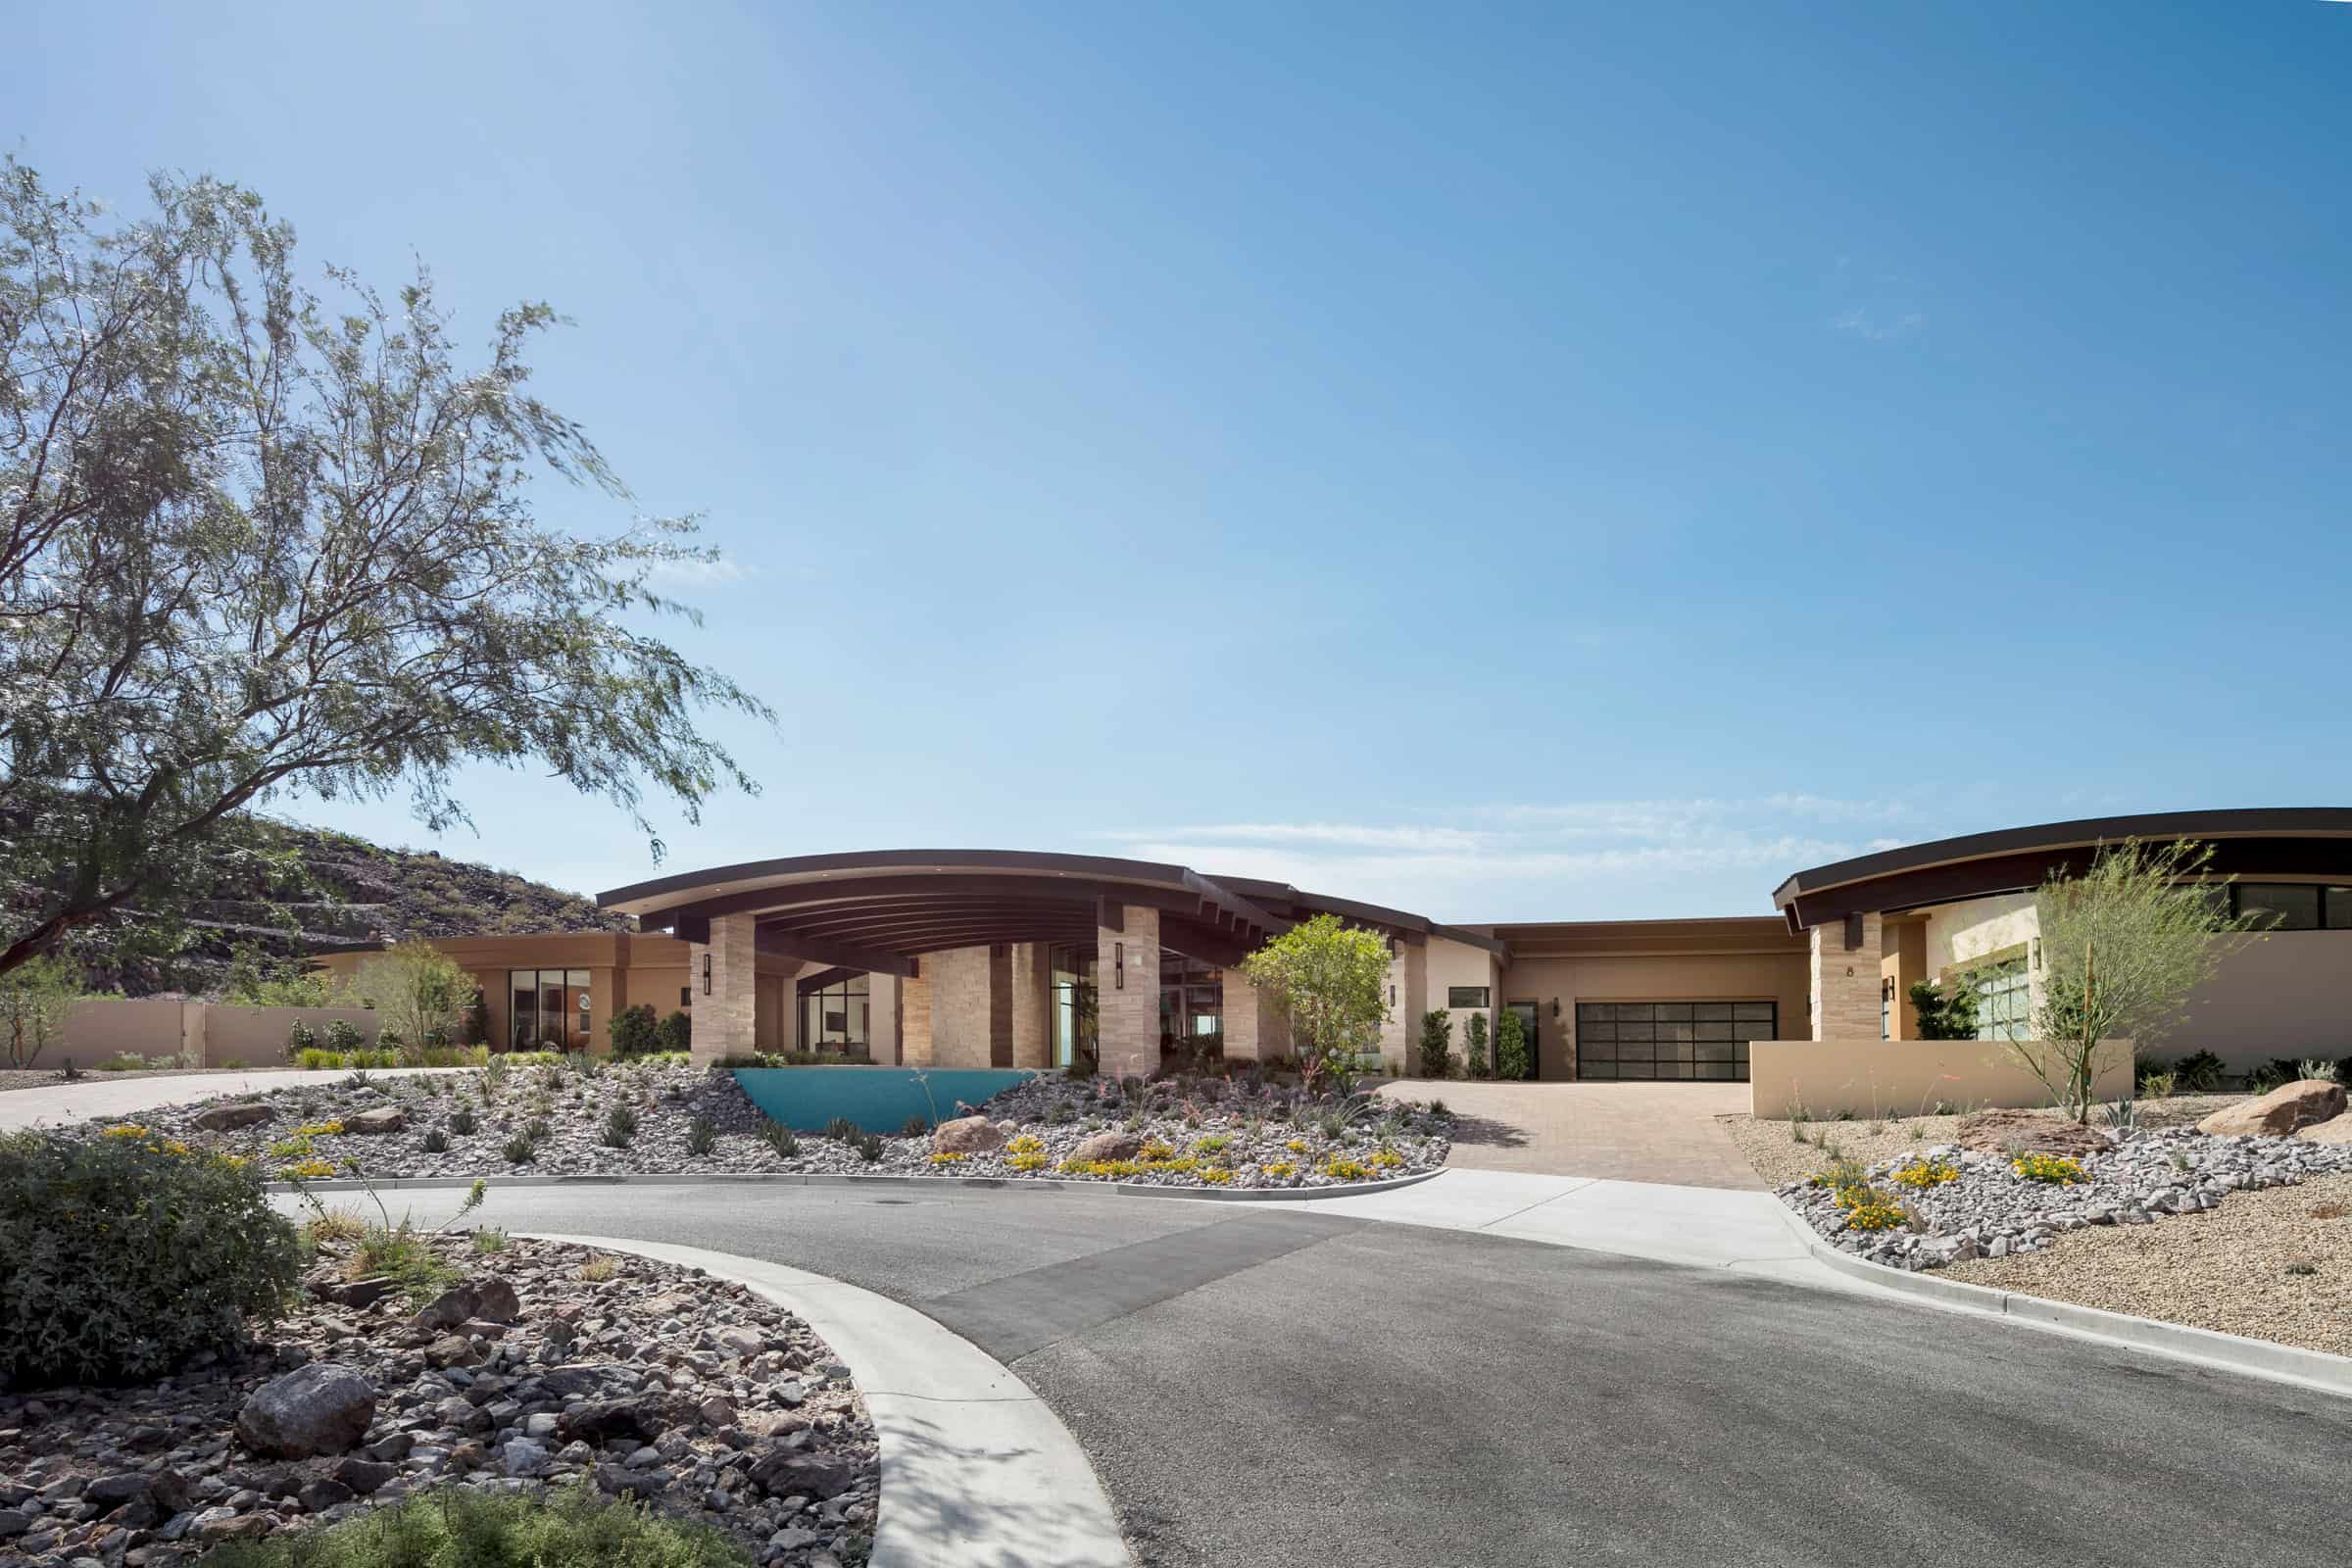
We start with the daytime exterior of the “big picture” capturing the structure frontal and sideways, front and back, and any other angle that explains the location and where the space is situated.
Moving into the interior to show the inside elements both structural and use of space, this can be the entrance, staircase, and elements of design to the inside.
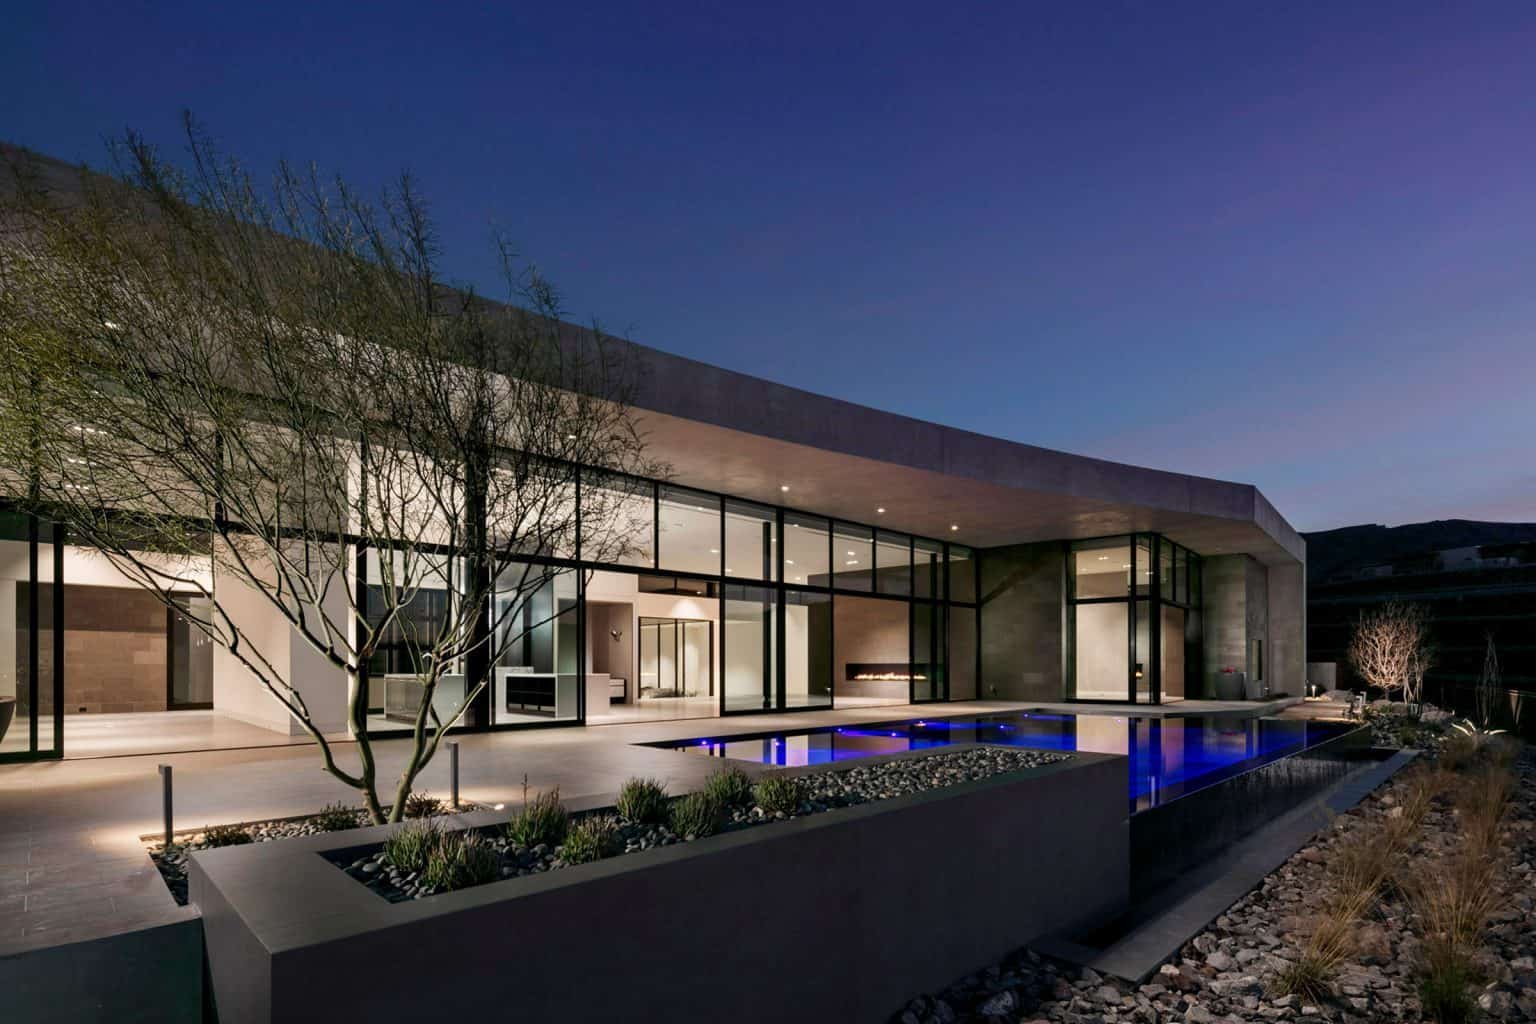
Finishing the day with some dusk/sunset visuals of the front or back depending on where is our “hero image”
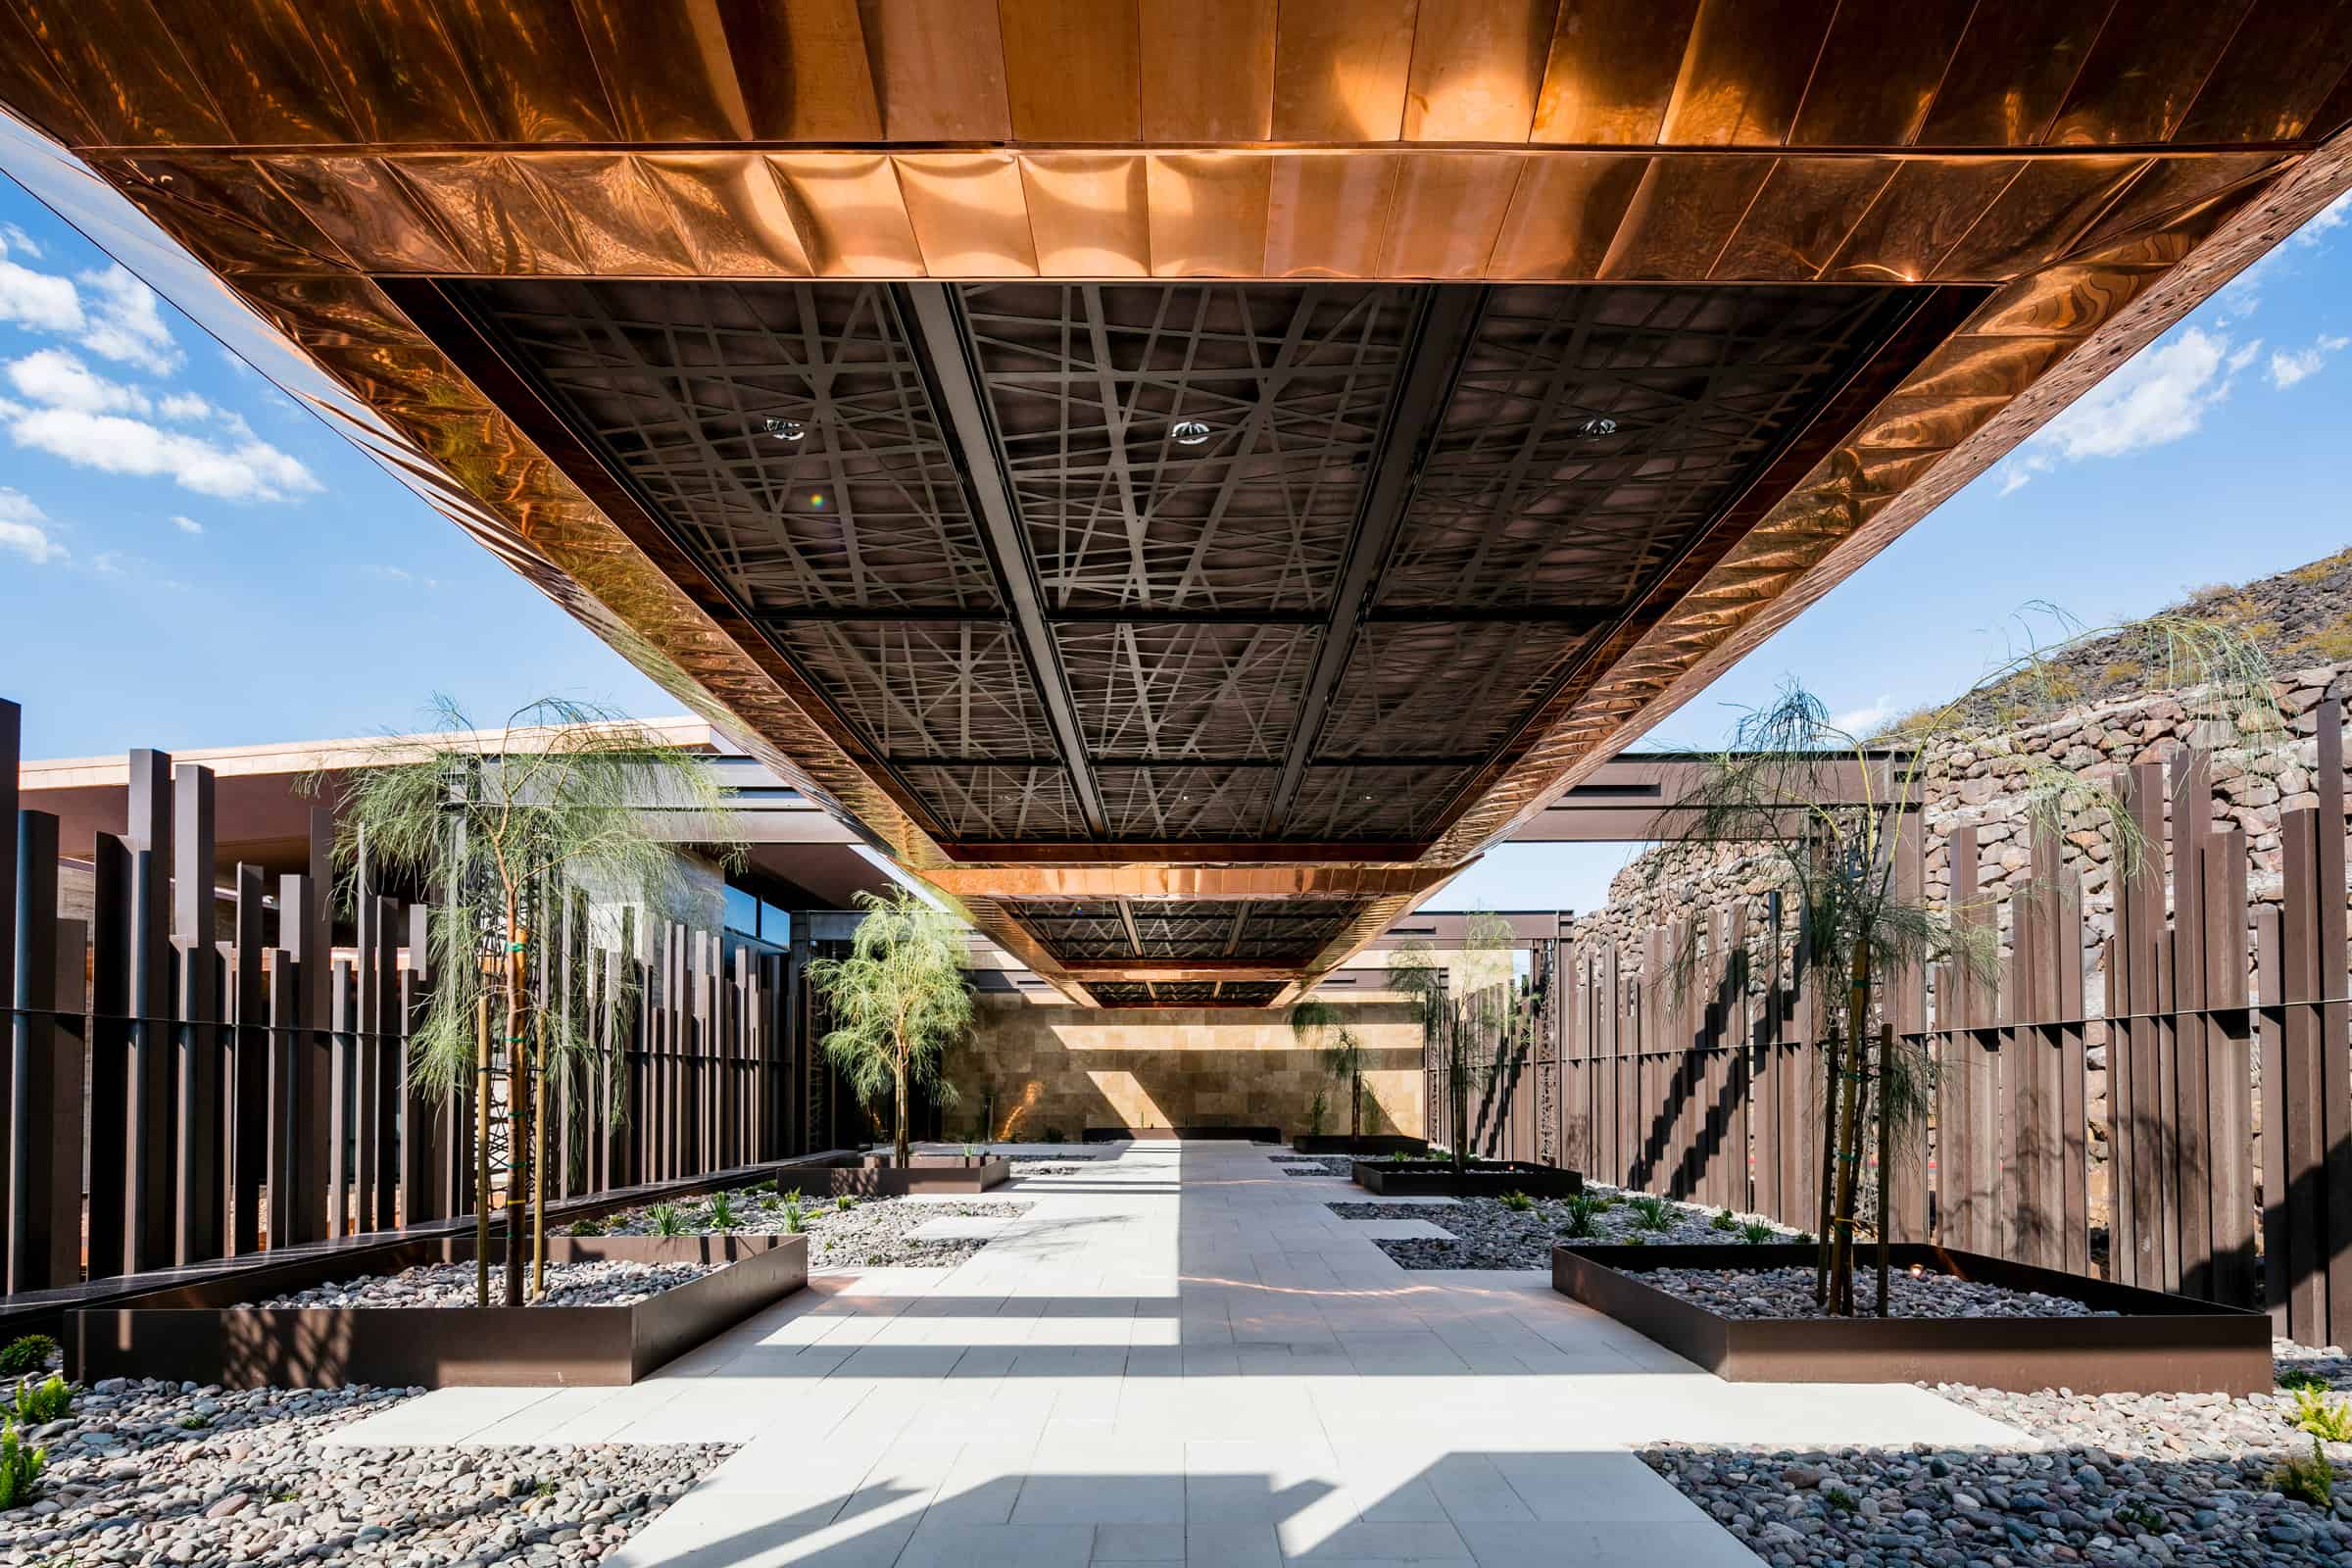
On the commercial side, a great project we worked on was a TV station’s main offices and production space at the aircraft landing root just a few miles away from an international airport.
Besides great architecture, it was important to showcase and hint to the viewer that the place was designed with noise cancelation in mind which emphasizes the client’s work beyond just the beauty of the structure, but shows utility.
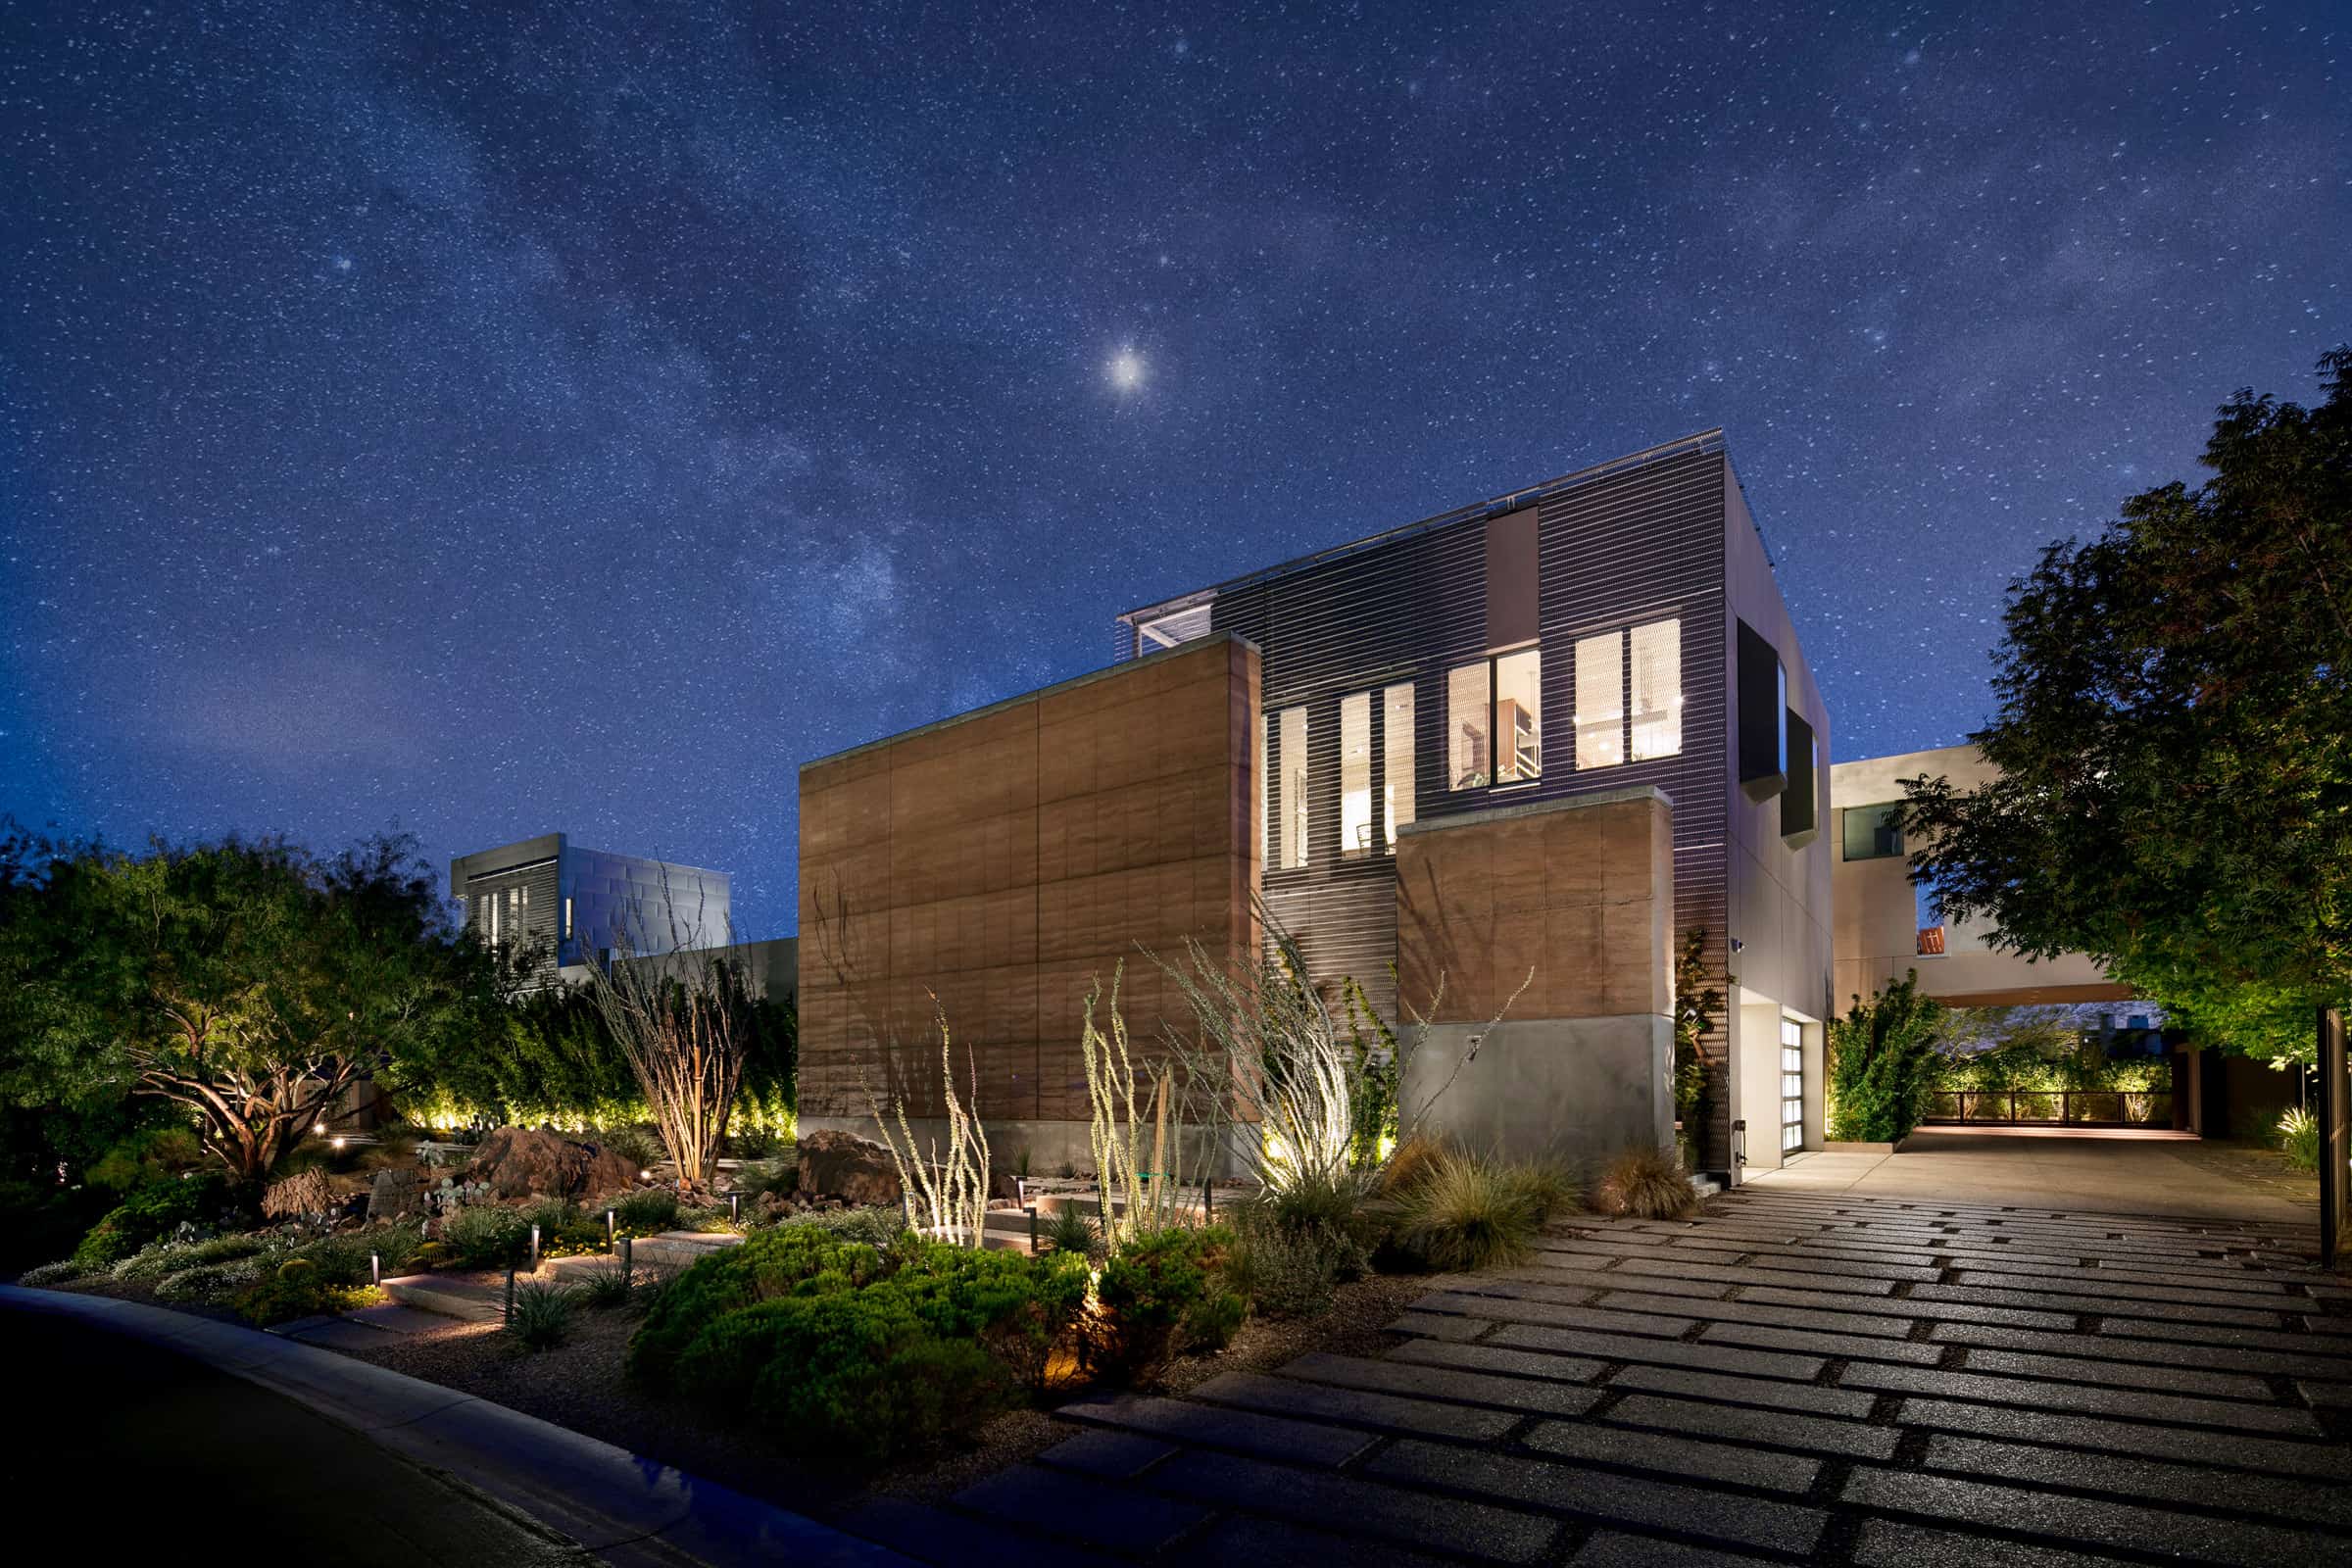
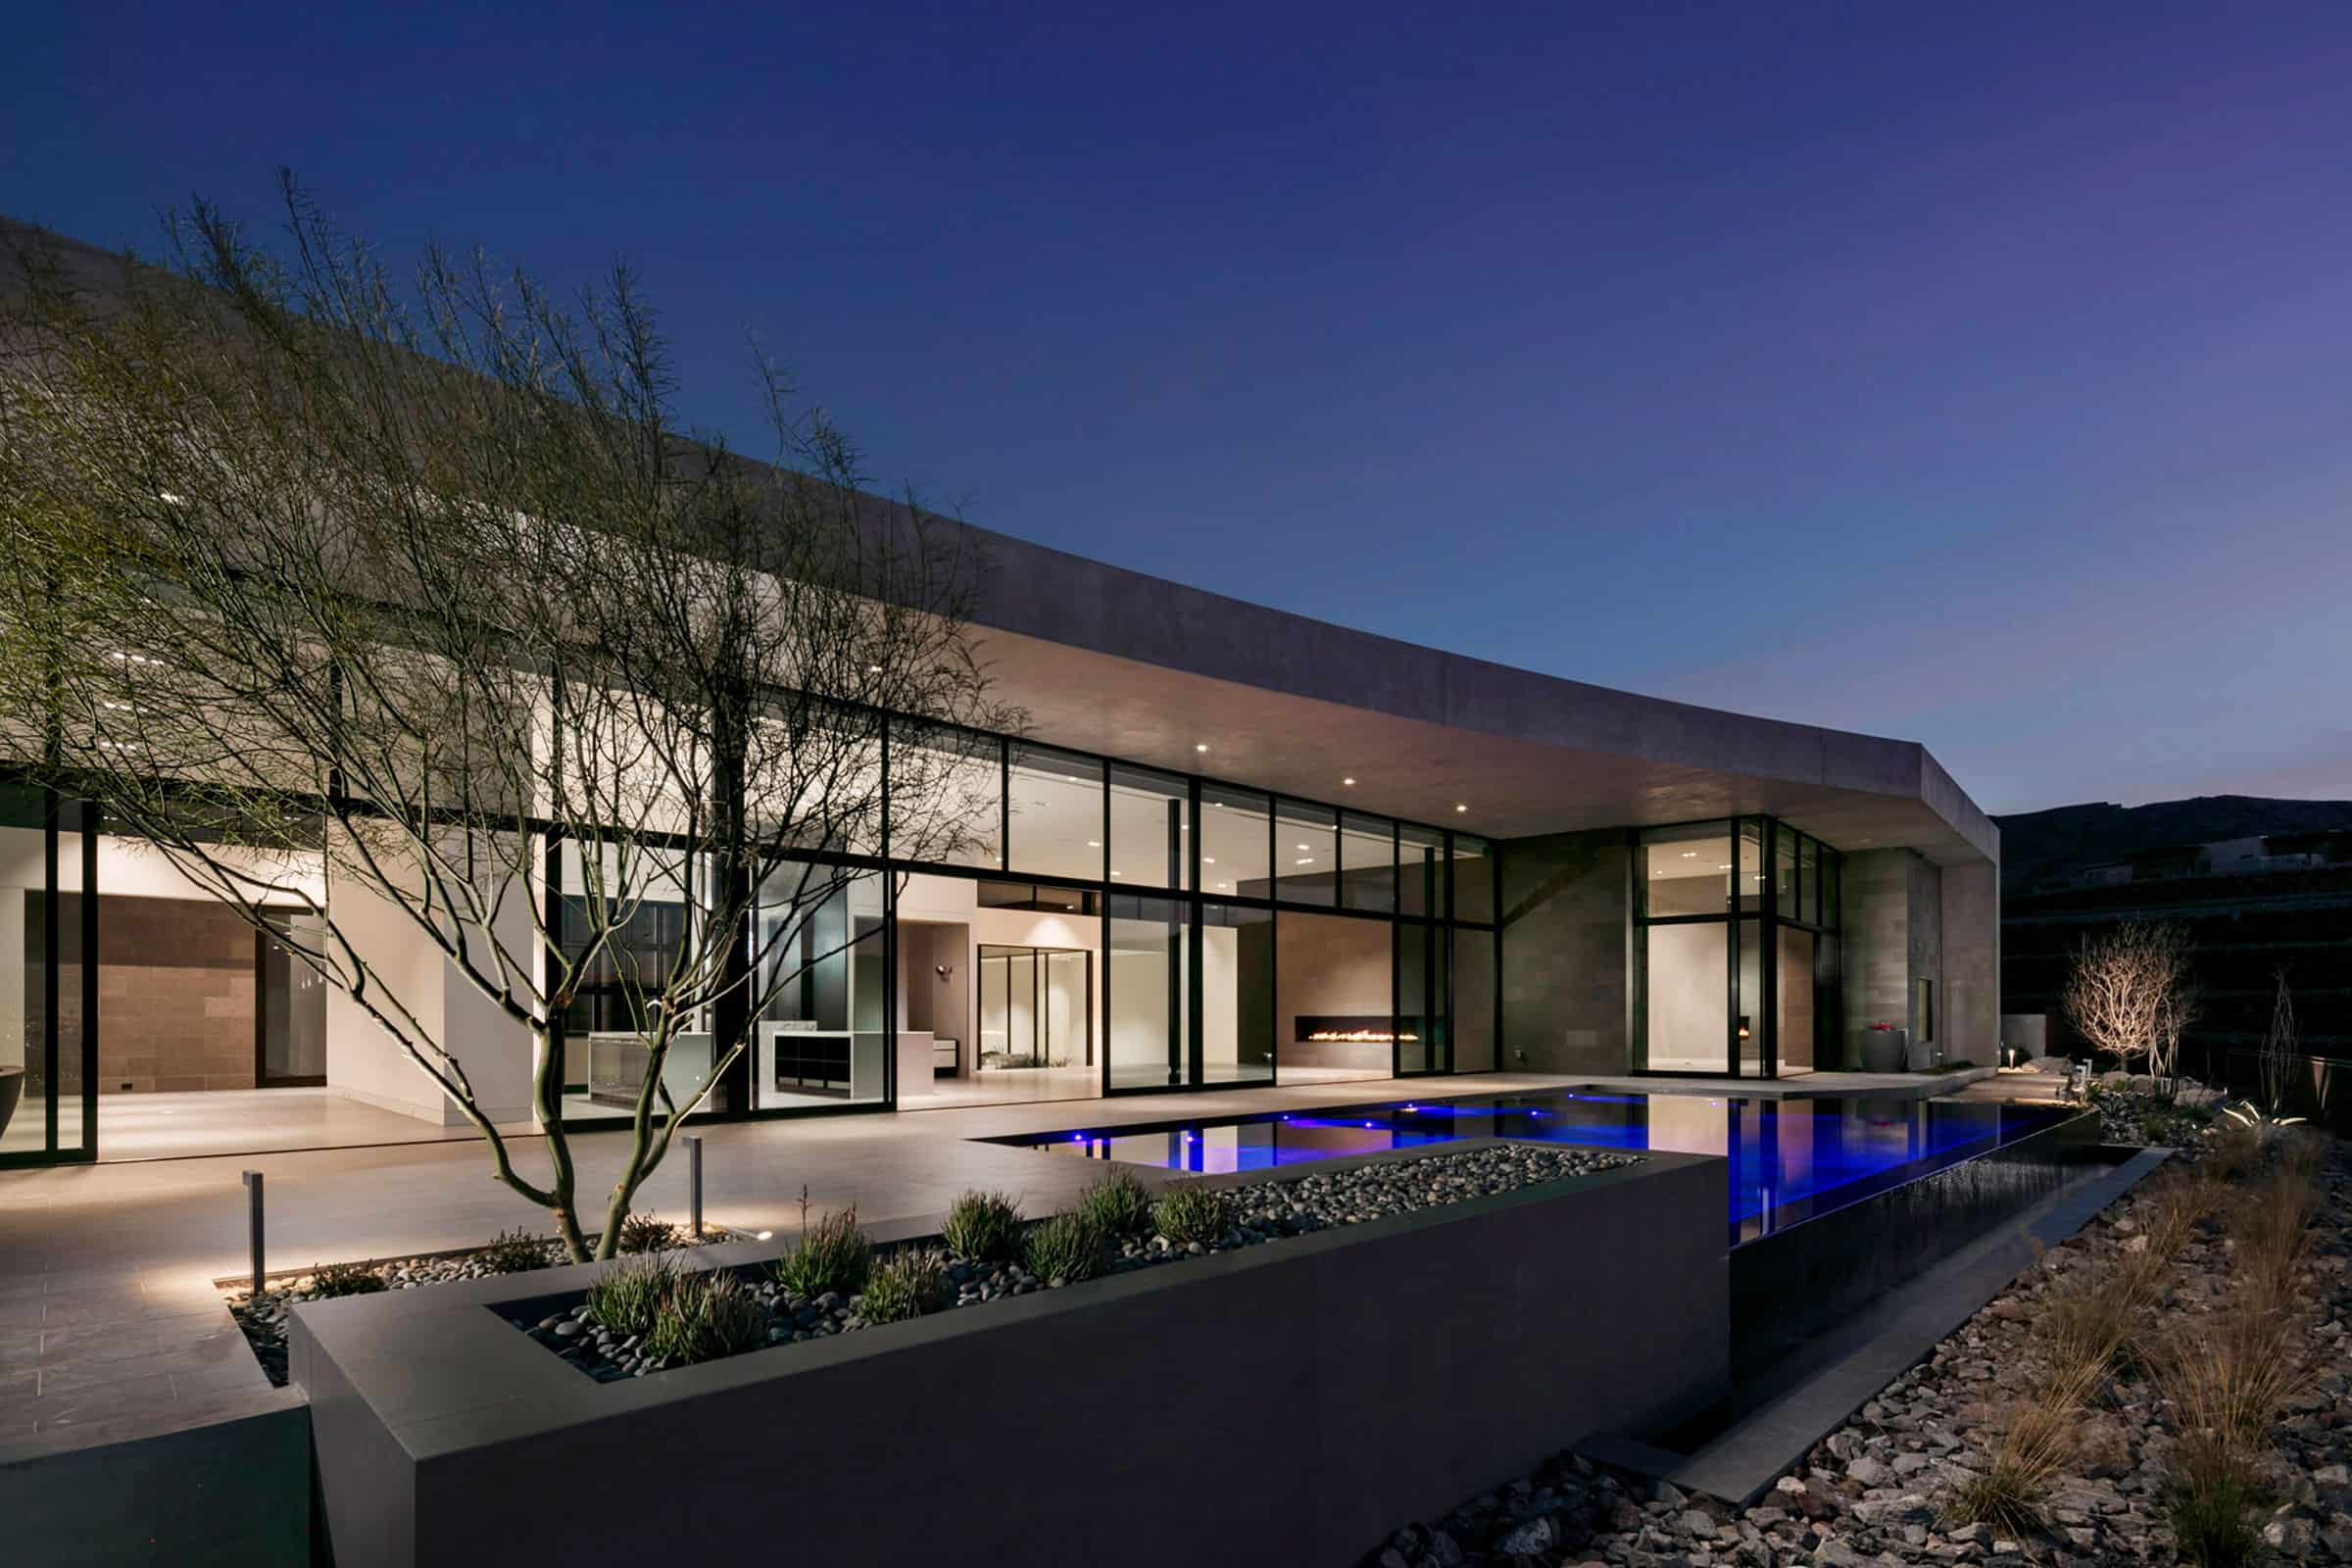
On the residential side, one project was located in a “no light pollution” neighborhood, which means you need to use minimal outdoor lighting to see a black Sky.
So we had to incorporate the mood and feel to emphasize the importance of having a clear sky in this area as it impacts the amazing view of the property.
Read more about light pollution and see the amazing phenomenon on the map.
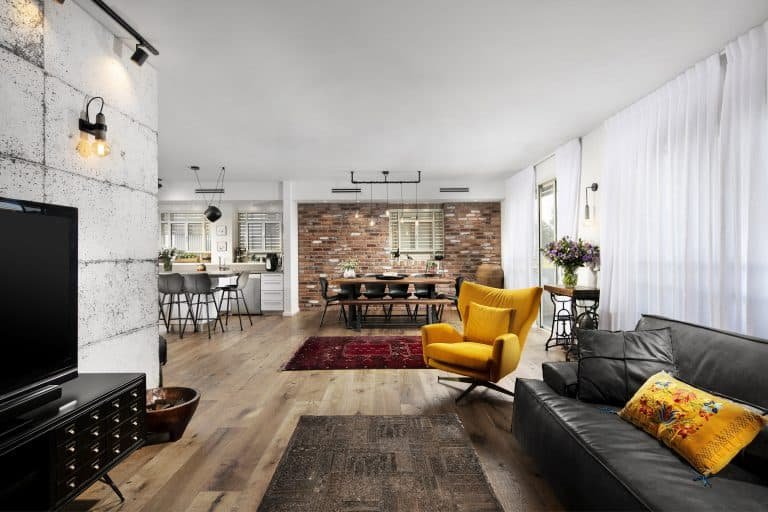
Interior Design
For interior designers, this is pretty much the same just in reverse.
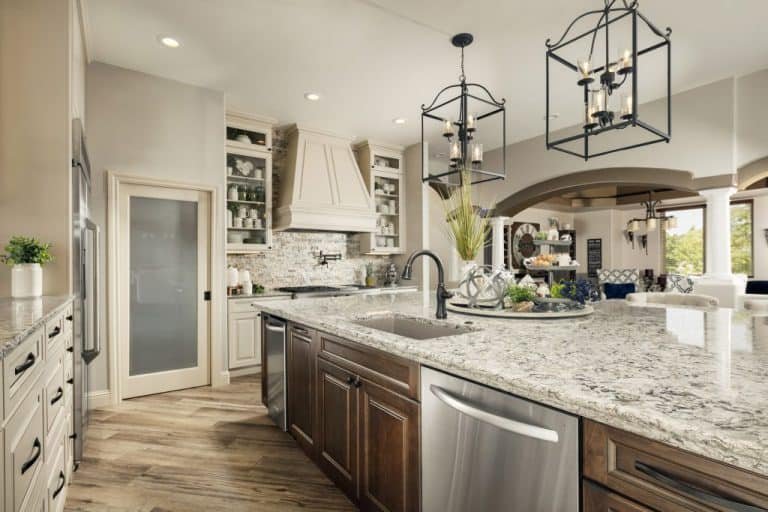
Interior Design Photographer will start to tell a story based on the most usable areas like the entrance, living room, kitchen and dining room, master bedroom, master bathroom, and other rooms in the space.
Then we focus on the outdoor experience and architectural elements both front and back.
Another big misconception is that designers should focus on the furniture and elements.
It is important to see the big picture because anyone can buy a piece of furniture, but only a designer can create the entire experience by putting all of this together.
We first must show the potential client and let them immerse in the experience, they don’t buy a single piece, they buy the entire experience of owning a design space, living the dream, usability, and productivity.
Hospitality
One of my true favorite focuses in the industry as a hotel photographer is creating dreams and excitement for hotels, resorts, restaurants, and other hospitality spaces.
While hospitality serves a “pretty basic function” in the eyes of many, you truly have to understand what is it all about.
Guests spend days, weeks, and months dreaming, planning, sleeping, and talking about their next adventure.
We are not trying to sell them a place to sleep or to eat, we are trying to create a customer experience, something to look for, to plan for, to be excited about.
The way we do this is by, showcasing the in and out day and night.
Starting to tell the story from the front of the space, moving inwards to the waiting area, front desk, or reception.
Walking through the public areas, maybe it’s a casino, maybe it’s an F&B area, art and store, and from there into the rooms.
Rooms, suites, and any other accommodation both high-end to affordable should get the guests excited, and explain to them the in and out of the room, the views, and the layout.
Retail
While online retail is booming, there is nothing like going out to shop, measuring, and enjoying yourself.
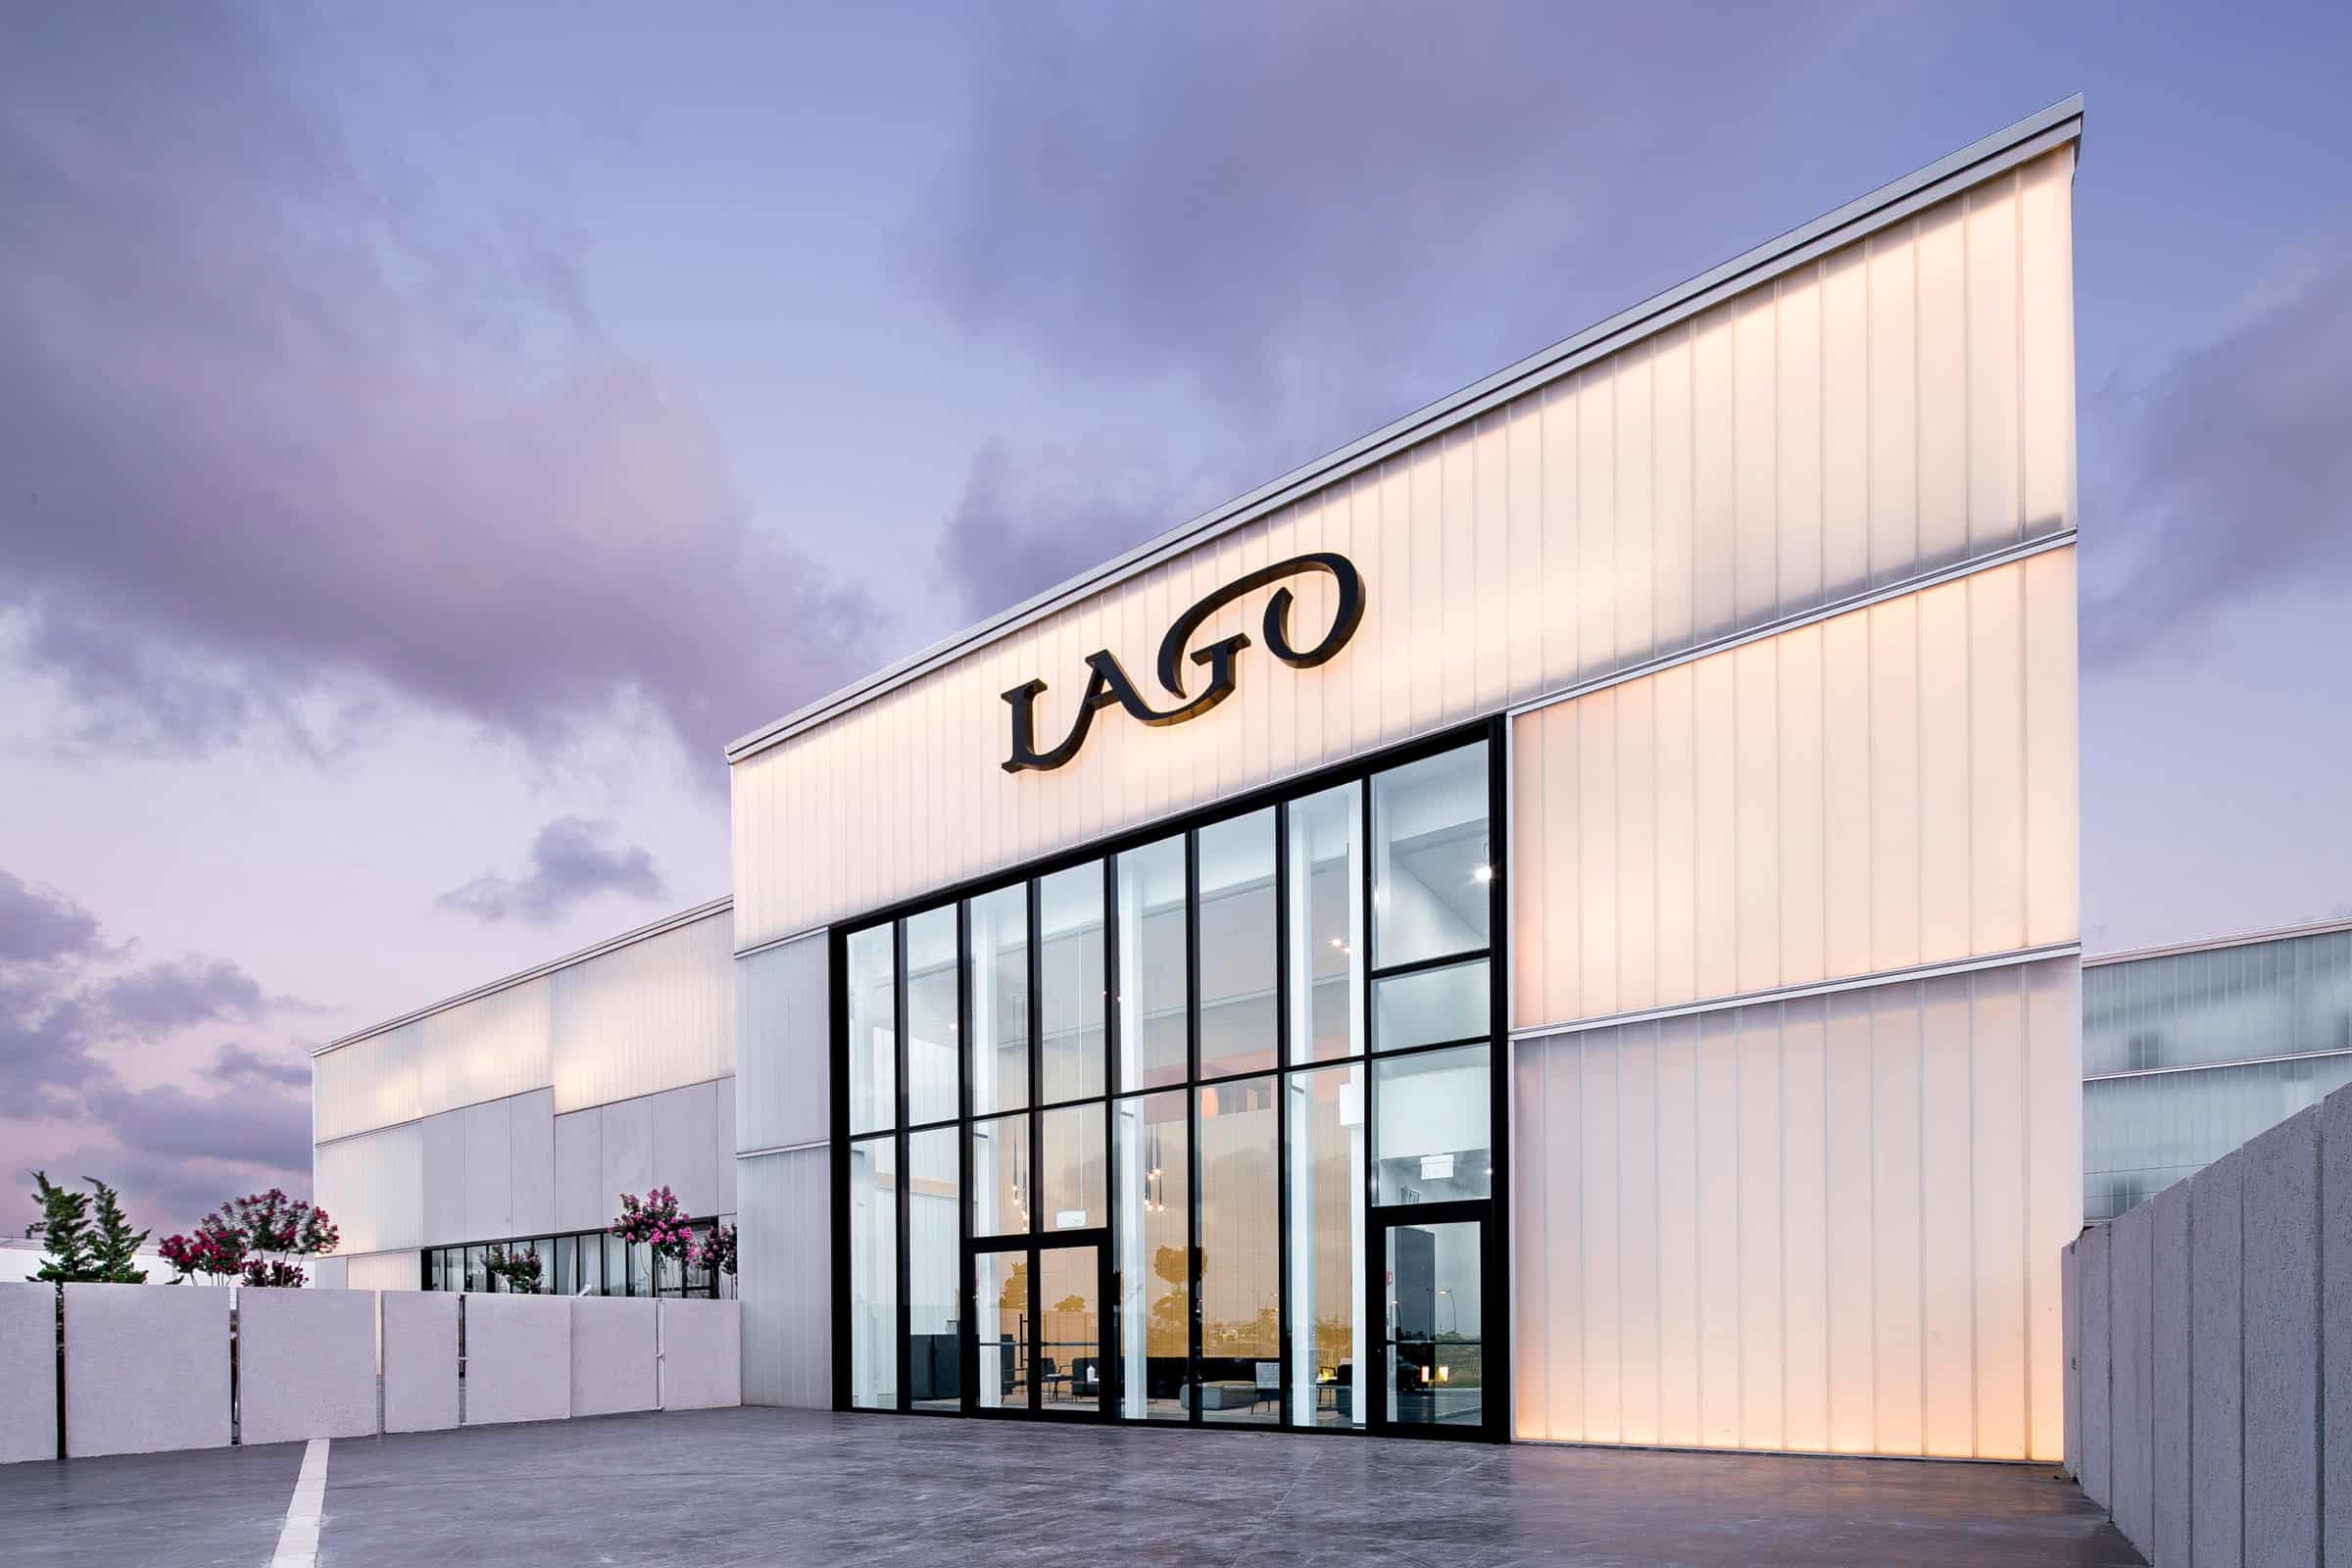
Our goal is to create shopping excitement by capturing the store exterior so they have a visual that will help them recognize both the brand and the location.
Moving in focusing on showcasing the overall sections of the store to allow them to start planning for the journey.
Commercial Spaces – These can be offices or industrial, same rules apply here, we must tell a story out towards the inside of the space.
The exterior should focus on the environment, size, and finishes, while the interior should focus on usability and productivity and how architecture takes a place in space creation and aesthetics.
Manufacturing
Hold many of the trades, lighting, kitchens, cabinetry, material and finishes, appliances, and others.
50% of their works are done in a set or a studio, but there’s always a need to showcase a real-life project and how their products play a significant role in the big picture.
We must show utility, and focus on the impact of the product on the overall experience to attract sales for our customers.
What makes an amazing architectural photo
Amazing is a big word for beautiful images, in my mind, an amazing picture is one that both looks appealing, creates curiosity, and sells my client’s work.
Ok, ok, let’s stop with the “big words” What does it mean?
It means that you need to create a picture that includes many elements together.
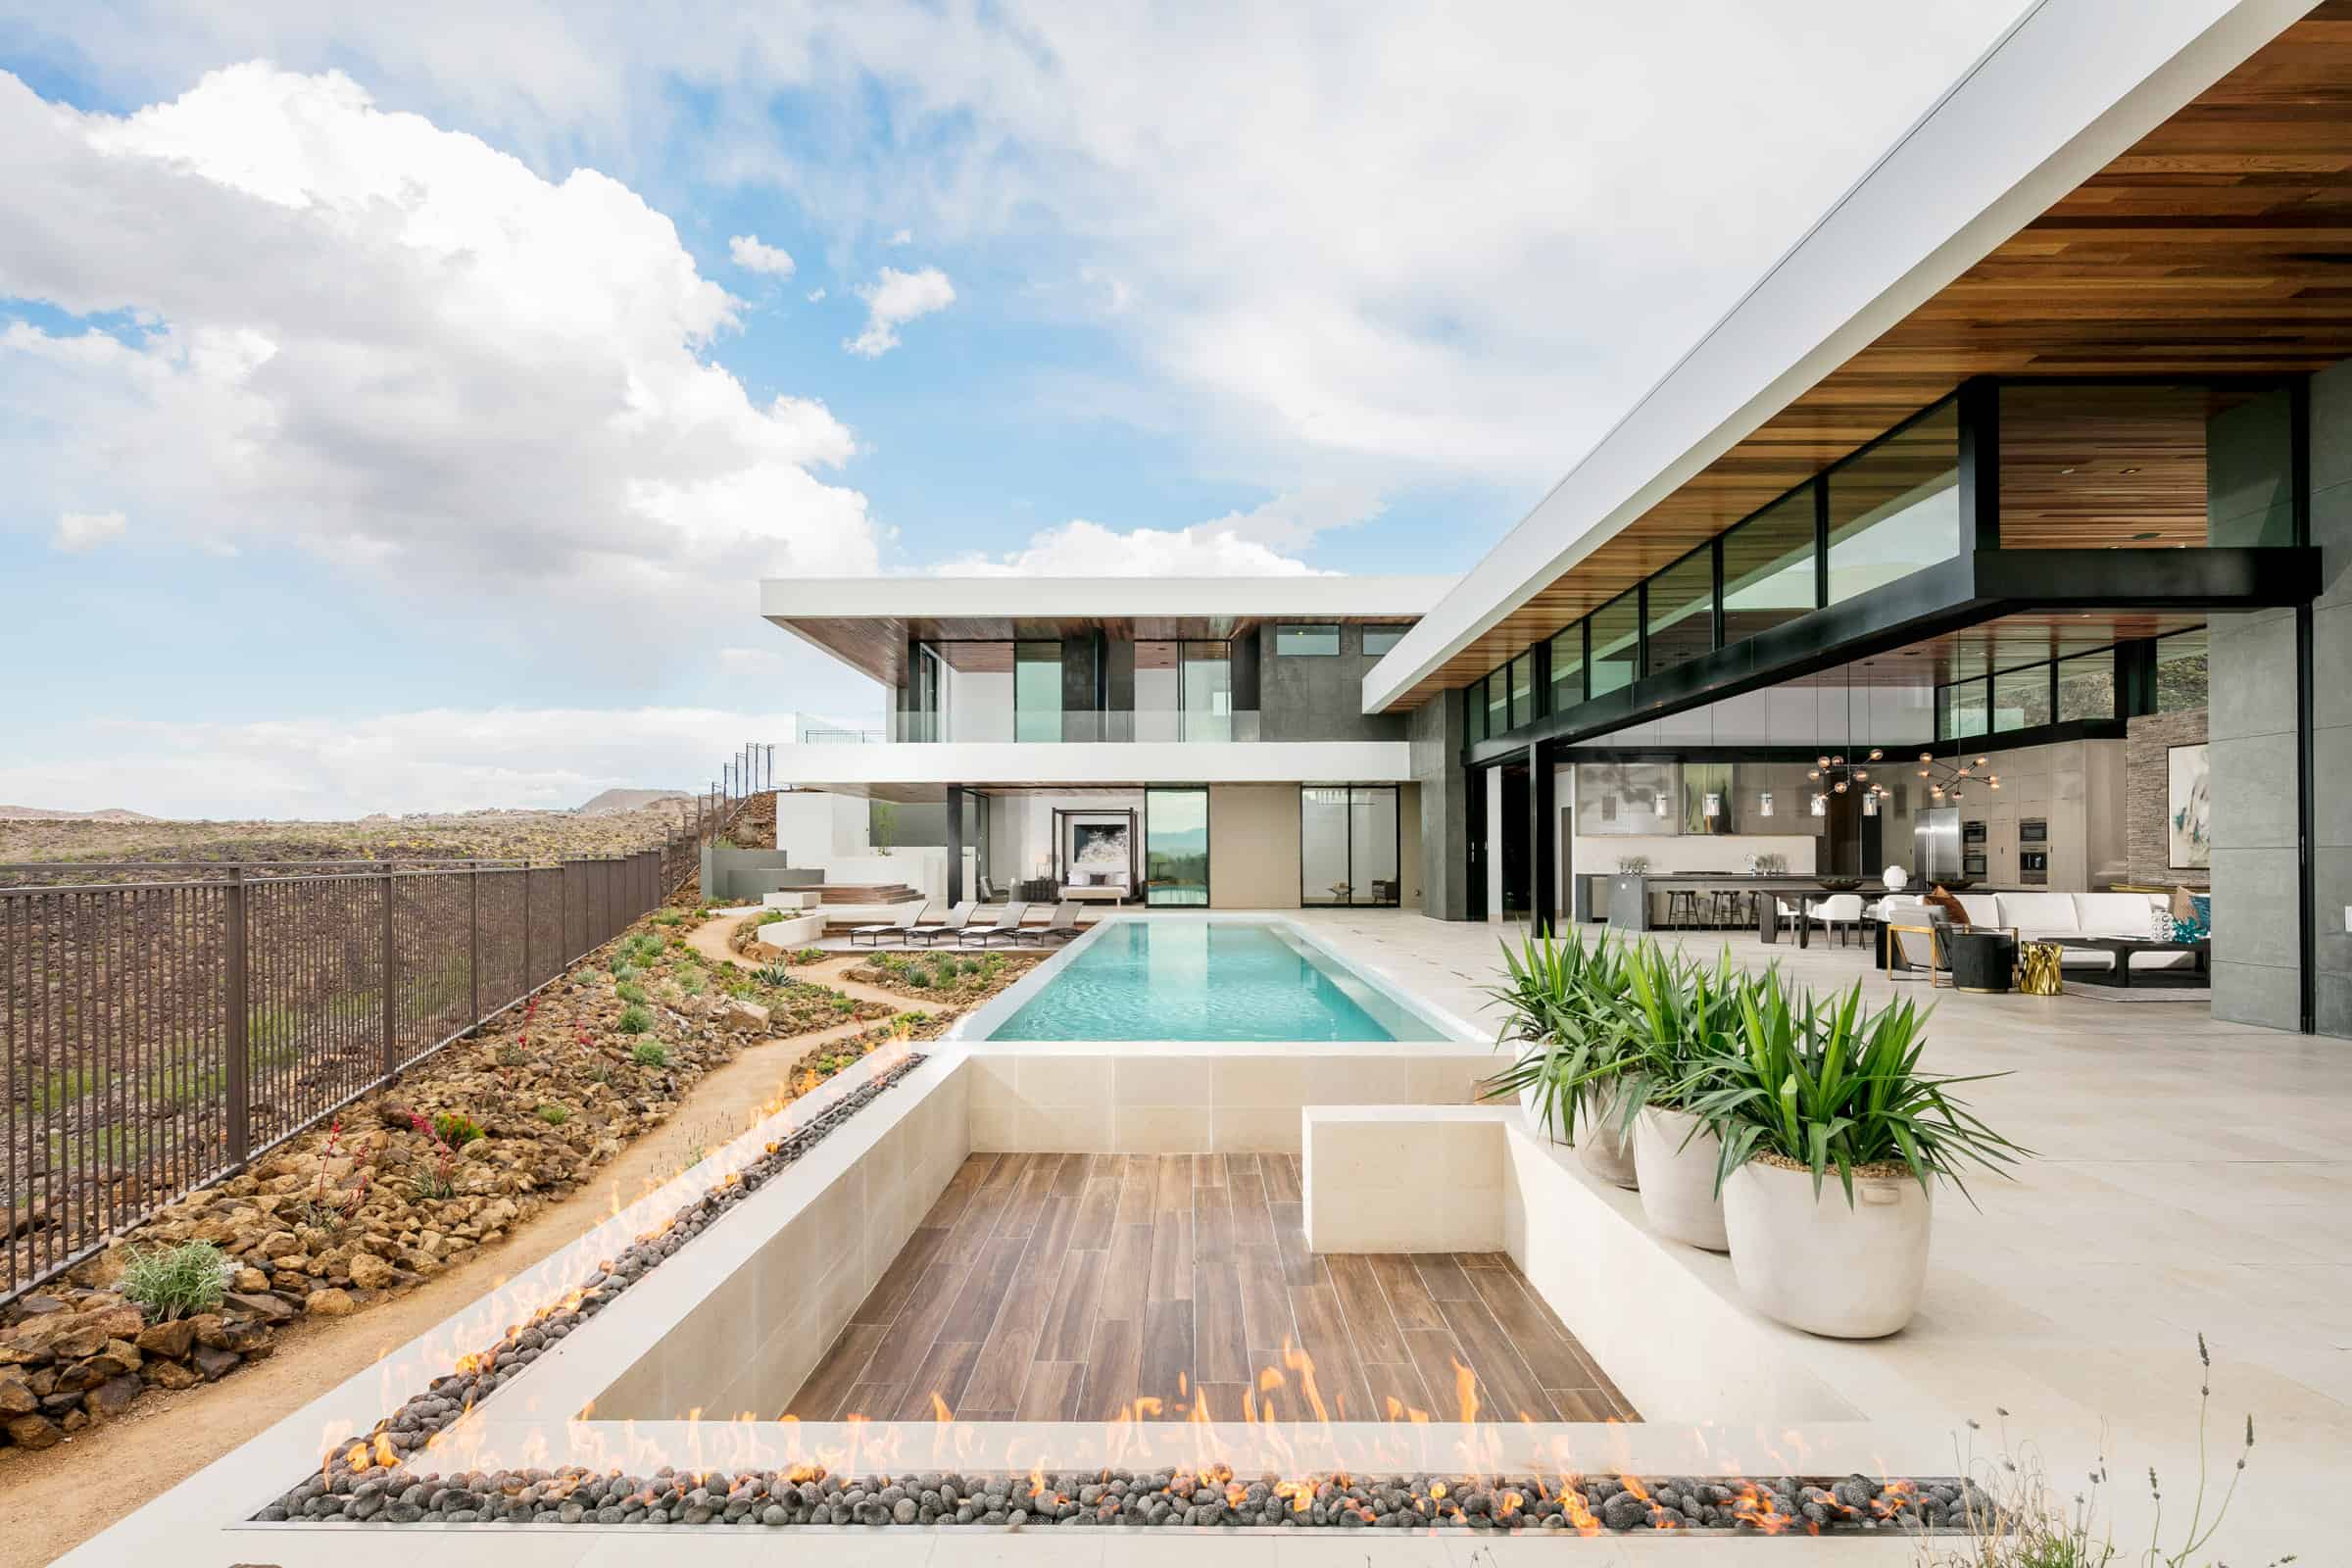
Let’s take the living room as an example, for me, it’s all about the experience, can we see the outdoor features? Can I see the landscape and views?
Can I understand what is to the left or the right of the living room? Can I see the fireplace, lighting, TV, furniture, the finishes? Can I understand the mood and feel of the space?
Before you capture your next image, make sure you have the answers to all those questions before you choose the angle that works best for you.
My approach is to tell a story about the space, the environment, the material, and its usage.
I am trying to find strong angles that incorporate the main theme but also hint at other connected spaces, areas, or utilities.
Before you hire a Professional
Review their portfolio, while this may seem obvious the focus should be to look for consistency throughout the entire portfolio.
Does the small project look as good as the bigger ones? Is the style consistent throughout all projects? would you hire their client after looking at the visuals?
Quality or Quantity – most industry leaders have 2-3 photoshoots per project, they understand that you can’t create 40 breathtaking images in one a day and not also in two.
Your goal is to have enough visuals that represent the project for years to come, but they have to be those images that sell your work so make sure you do the right balance between quality and quantity.
Go National or International – The majority of our clients are across the EU region, Germany, Poland, Italy, France, Norway, and even the UAE.
If you can’t find locally the talent you are looking for you are not alone, we travel 90% of our time for our clients.
Today it is much more cost-efficient to travel. 2-3 hours we are in most destinations in Europe, your goal is to have consistency through your portfolio making sure you have a clean and powerful body of work no matter where you work.
Architectural Photographer Salary?
This is a broad subject with many elements that impact the cost like experience, knowledge, equipment, license, number of images, days, locations, and many more. I will try to give you some overall market pricing and more importantly, understand what impacts that pricing.
Real Estate – €500-€1,500 per shoot (8-30 img.)
Arch & Design – €1,000-€4,000 per day (8-14 img.)
Hospitality – €3,000-€6,000 per day (6-10 img.)
It does not matter what you pay, It matters what you get.
Are you considering yourself second to none? Do your images are better or the same as your number of competitors?
If you take an average of 5 working days per month your monthly salary will be an estimated 3-5K per month in the first 2 years.
Once you get more experience and increase your clientele circle, based on 10 working days a month you can achieve 15-30k monthly salary.
What I must understand about pricing?
Type of the client and usage matters, will the visuals will be used to sell a space (typically 6mo. Of usage), or will it be for reselling a new development, restaurant, or hotel for a couple of years?
Amount of image, commercial imagery is not volume-based, meaning you can create only 8-12 images per day because it requires a lot of time both on the field and in post-production.
Level of work – are we doing a single image (one click) or we are doing a series of dozens of images with different lighting and accessories to create one polished image. (Time)
License – Where the pictures will be used? Local, national, or international, and for how long? Will the client be the only one using those images or do they want a buy-out license (they own the images) and can transfer them to 3rd party to use without further compensation for the photographer?
Results – overall you pay for results, experience, technique, extra equipment, and post-production like our client says, we know it takes 7 hours to capture a luxury penthouse of a hotel, but we need you to make it in two hours, anything is possible and client is willing to pay more as they lose thousands on every hour those penthouses are not available for their wealthy clients.
If you want to understand more about how pricing is structured make sure you read about commercial photography pricing.
Most Influential Architecture Photographers
Well, we can agree to disagree, those are the most influential based on my opinion.
Frederick H. Evans
A British brilliant photographer who is best known for his cathedrals and prayer structures in France and England.
Combining a more modern look approach before all of us were here.
Carol McKinney Highsmith
From urban trough lifestyle, Carol has documented architecture across the US.
Her work is now featured by the Library of Congress.
Julius Shulman
One of the most known in the industry. and one of the first to combine lighting in his imagery.
Julius was working with legendary architect Frank Lloyd Wright.
Berenice Abbott (1898-1991)
One of the most iconic New York photographers of the last century.
Berenice created impactful images of New York City over many years.
Allure Captures
Is a collective of top architectural photographers in Europe and the United States who created hundreds of famous commercial imagery through the past decade.
Most Famous Architects
Nouvel Jean
A French architect won the prestigious Pritzker Prize in 2008 for more than 200 projects including for Arab Would Institute, Torre Agbar in Spain, and many more unique structures.
Oscar Niemeyer
Brazilian Architects that considered to be one of the key persons to impact the development of modern architecture.
Zaha Hadid
British Iraqi architects who passed in 2016, achieved numerous awards and signed on many impactful projects like the Opera House in China, Broad Art Museum, London Aquatics Centre, and many more.
More worth mentioning are Frank Lloyd Wright, Ieoh Ming Pei, Dominique Perrault, Jacques Herzog, Louis Metezeau, Jorn Utzon, and many more unforgettable individuals who shaped the world we live in today.
How Architects Can Differentiate Themselves
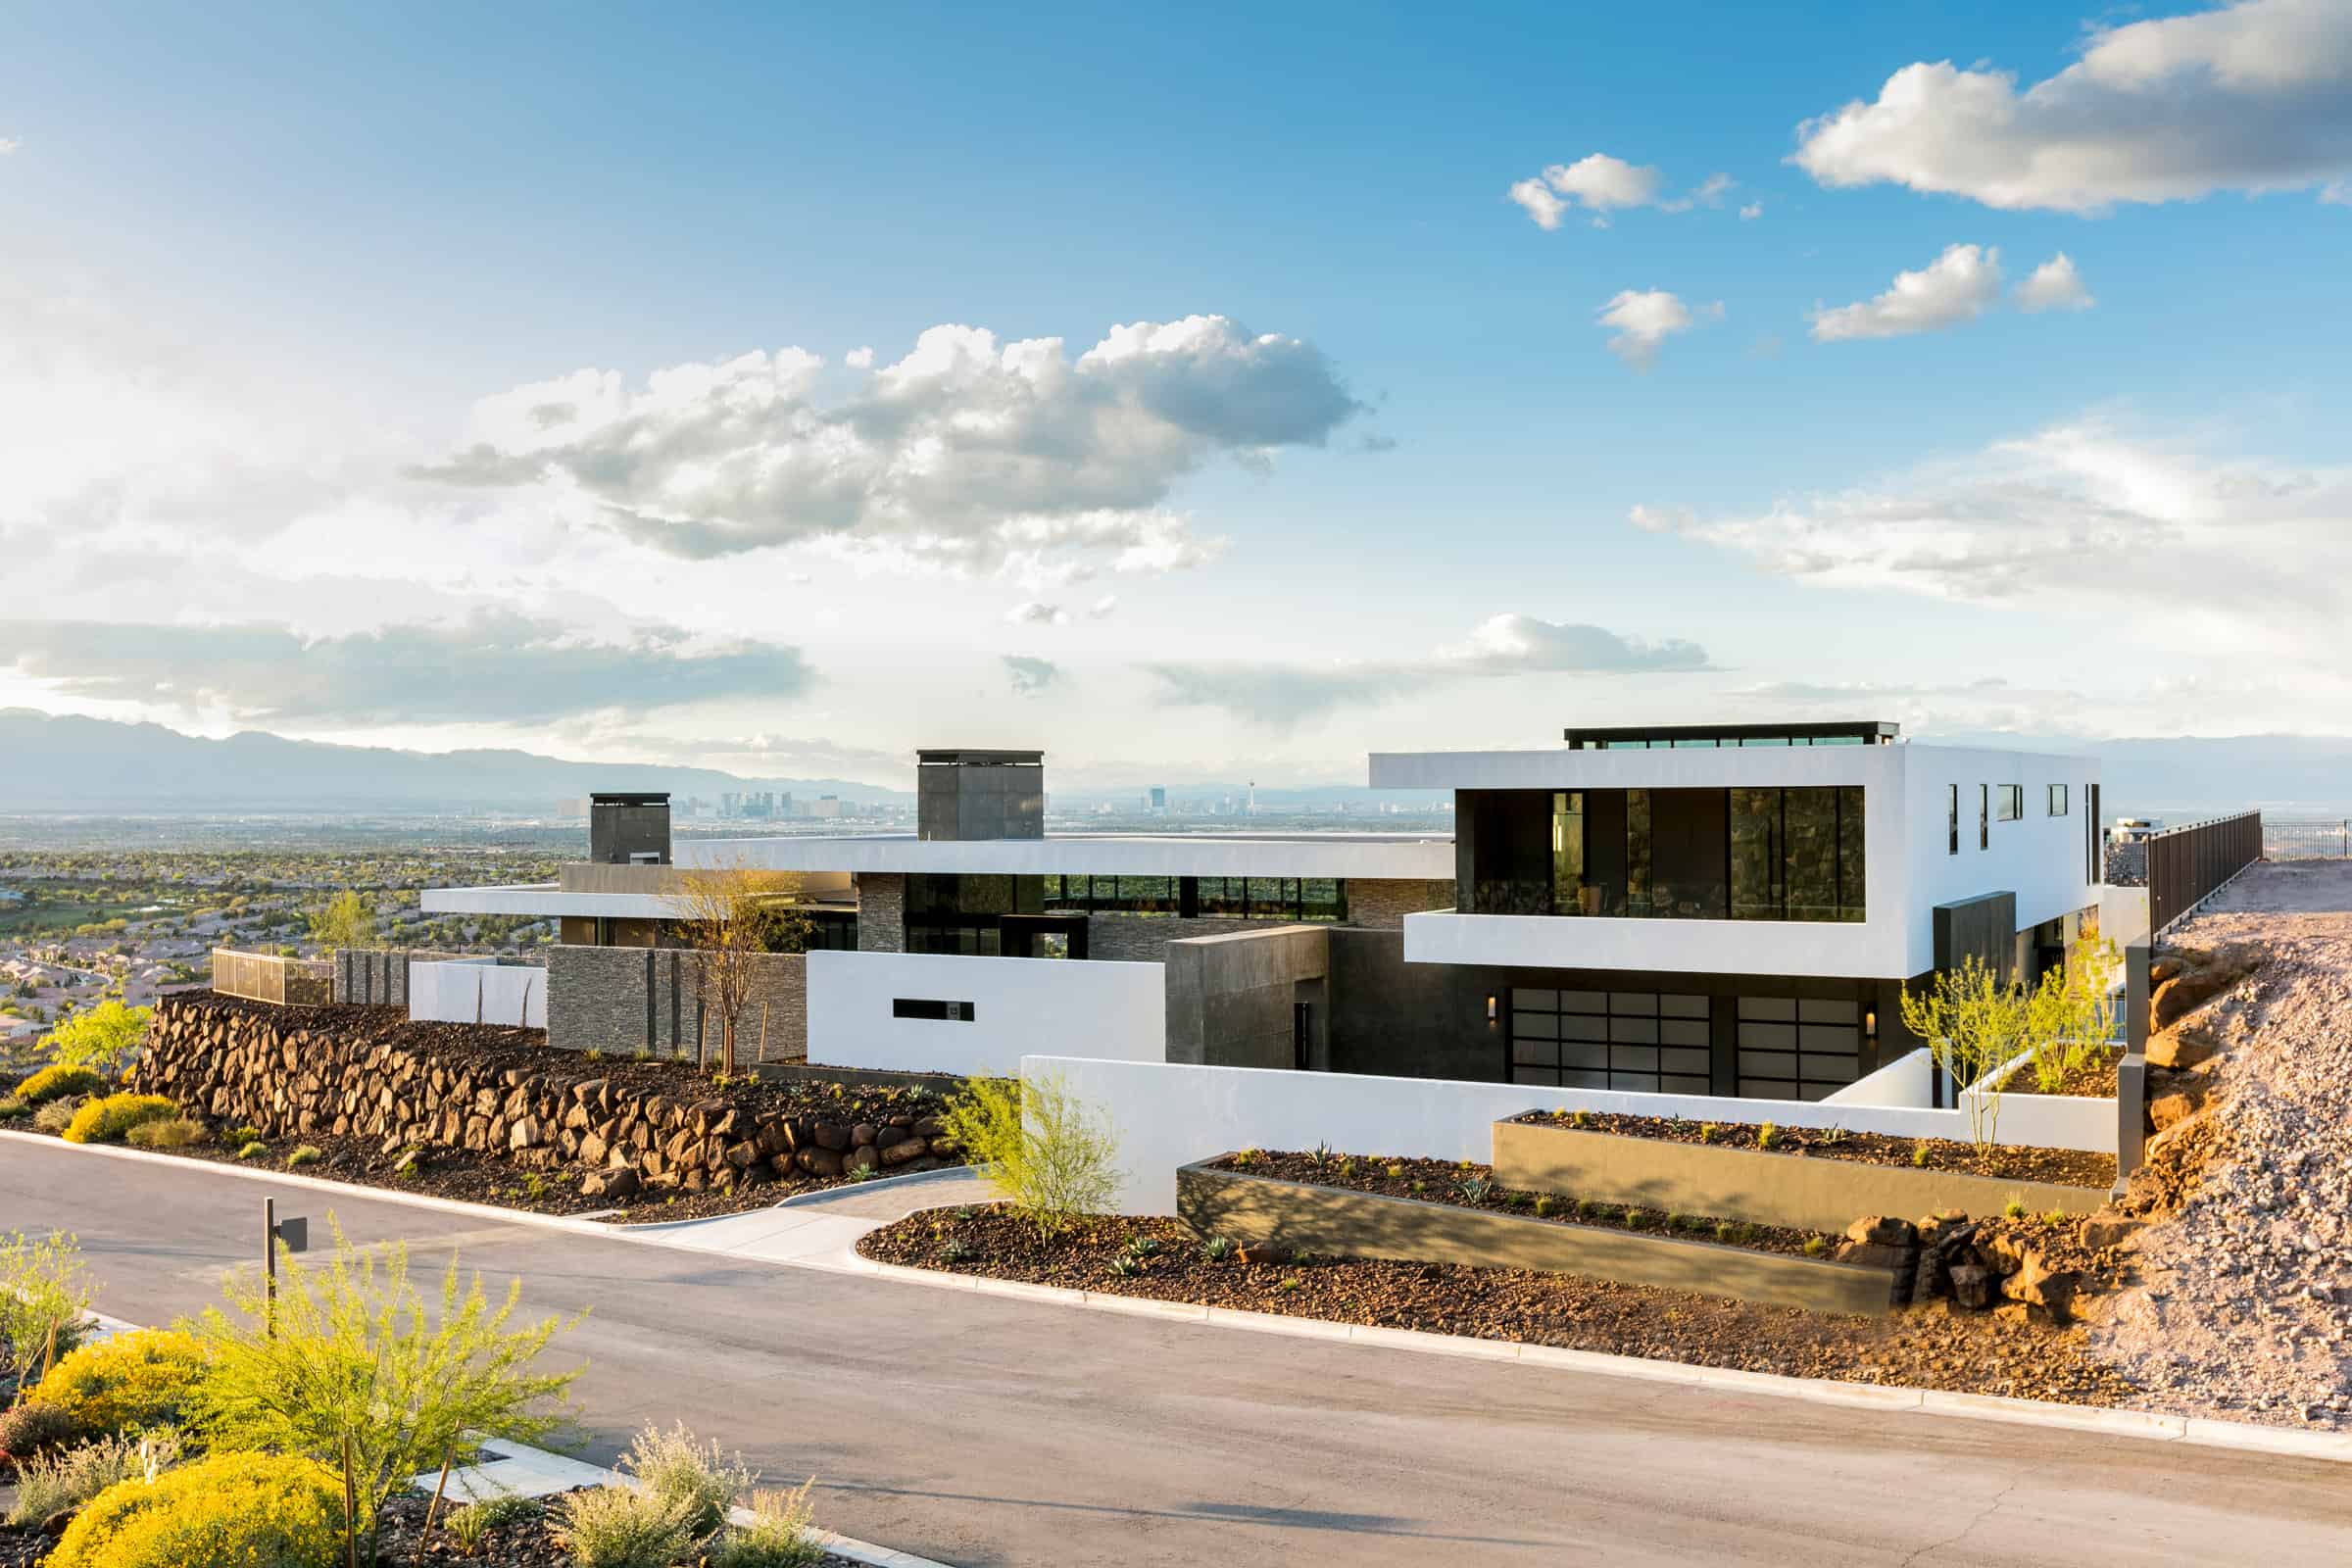
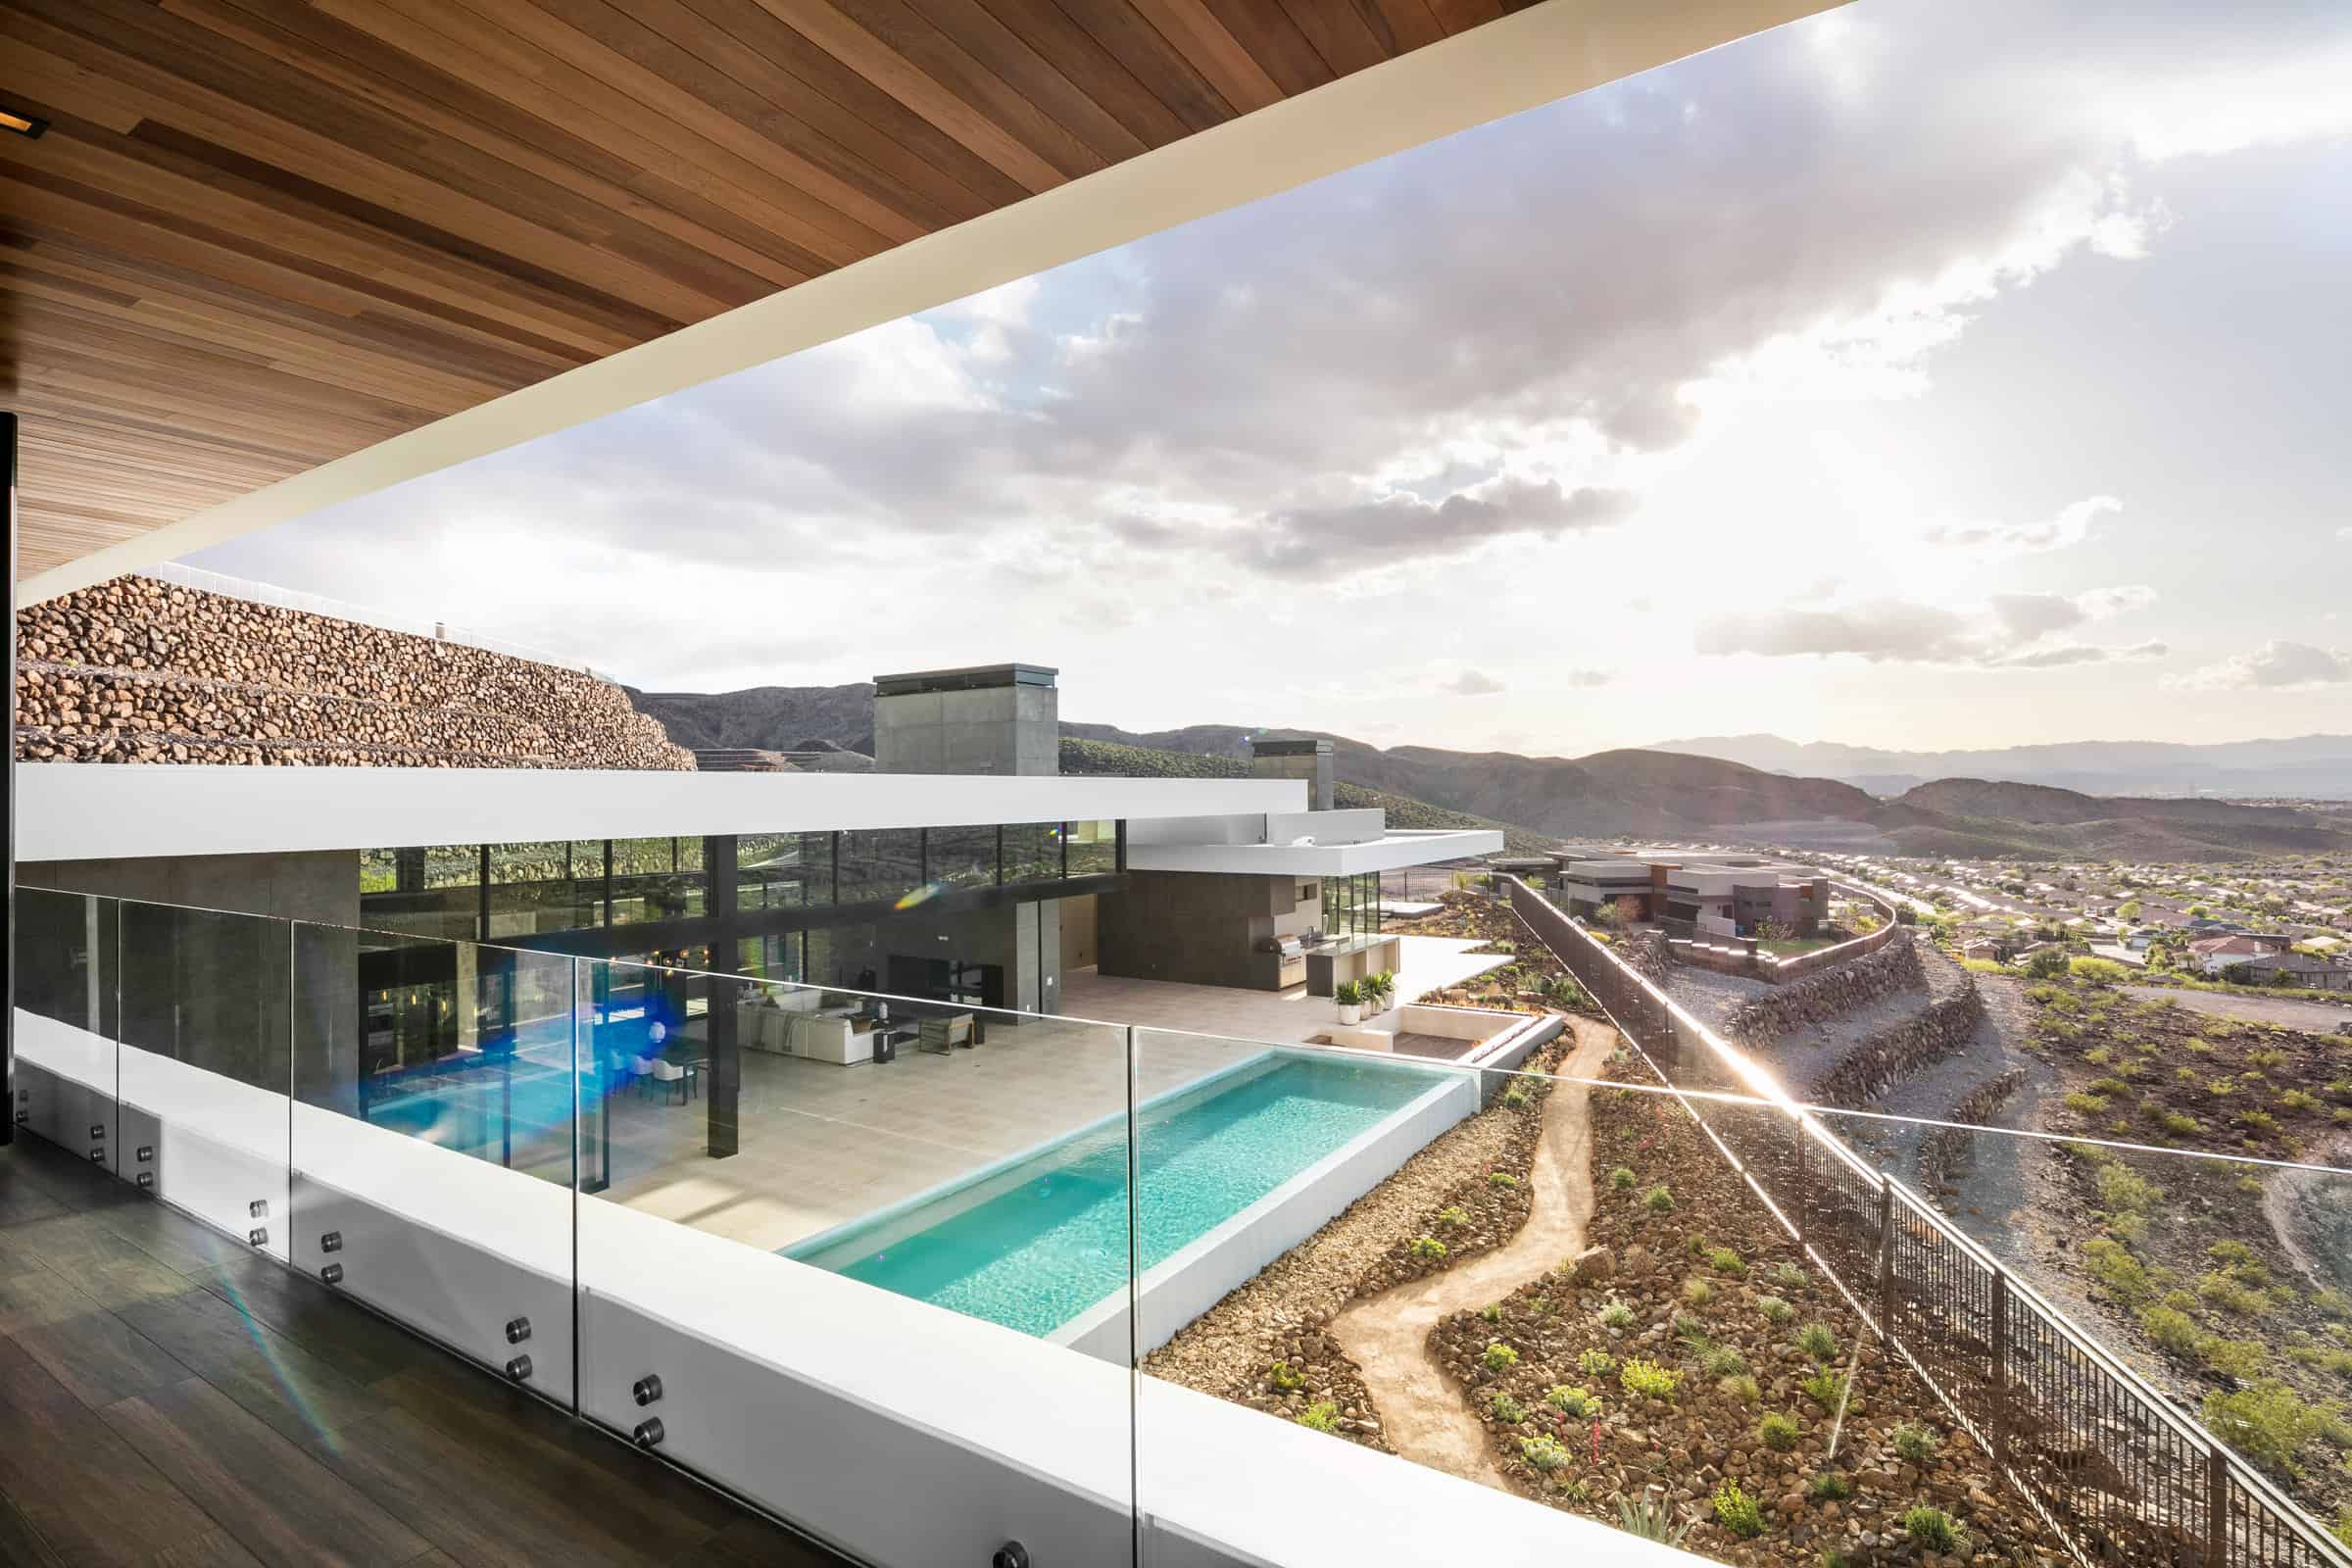
We are known for our ability to capture beautiful architectural images and connect them to the environment, both in daytime and twilight.
Depending on your needs and goals, we will capture the exterior booth day and night, the elements of design and material, both the exterior and the interior.
While many architects rely on renderings, there’s nothing like showing the project in real life, empathizing with the execution of the project, not just the vision.
The Importance of Standing Out
It’s important to understand that today, the competition is all around both new and tenured.
Stand out, as you only have several seconds to capture your potential client’s eye.
Your clients do not understand the architecture, materials, finishes, and quality.
The goal is to capture the attention of your potential client and create the emotion that will impact ultimately choosing you for their project.
What is the best way to learn Architectural Photography?
Learning the trade can be done in multiple ways, starting from self-learning, and online through academic options.
We should understand that it is mostly divided into two sections, one will be more “general” photography education and the second is specializing in architectural photography.
Self Learning – a great way to get a good understanding of everything in the industry.
If you are new to our world I suggest you take a short course as it’s very hard to learn things that you don’t know about, so any good and short fundamental course would do the trick, to open your mind and start understanding the basics and going on from there.
Online – Today you can find great online courses for beginners to professionals, short and long, amateur and professional.
The important is that you do learn from people you are inspired by, our field is very technical oriented so make sure you start at the beginning before you jump to more complex online courses.
Academic – while I haven’t done my education through the traditional academic, I did my research and decided to learn independently, while having a degree is always a plus, you don’t need to go through 3-4 years of higher education to be an amazing photographer.
In fact, with over 20 years in the industry working with leading companies around the world, not a single person asked me if I have a degree or higher education regarding my photography work.
But it is always good to have a higher education degree for future corporate development if you choose to follow this path.
If you want to learn more about learning feel free to read more about it here
Before you dive into arc & design you need to master your basic professional skills, no one solution fits all but I will review the options, if you are already a professional or have mastered the basics you can jump to the next section.
Online Course – there are so many resources out there, let’s start with learning photography fundamentals, basic framing, settings, aperture, shutter speed, ISO, and working with Manual mode.
I suggest you start with YouTube to understand the basics or take a crash course on Udemy or another online platform.
The most important is to learn from different teachers/professionals because, at the end of the day, you need to understand the concept and methods to achieve the same results.
Remember: your goal is to learn the basics so that you can move on to specializing in a niche.
Workshop – If you need some hands-on and like to learn in a group setting a course of fundamentals can do the trick, they typically take several weeks with 1-2 days per week or several days after another.
School – There are many online and in-person schools, but I think you can learn everything by yourself if you looking to learn the entire theory that might be a good solution for you.
Academy – Many universities and academies offer a certificate and/or degree in photography, while I always support higher education, I don’t believe that the time there would yield any better results than learning the basics via self-learning and a crash course.
Equipment and Gear
One of the most common questions we are getting from architects, designers, and photographers is what gear and equipment we use to create our commercial imagery.
Well, a “disclaimer” photography is done by combining creativity, light, and technique rather than specific gear, while it helps to achieve a higher level of imagery you must master many other elements in your toolbasket.
If you want to know what type of cameras and lenses we use, you can read about them here.
I try to explain also the value of each lens & camera we own.
If you desire to get into more details about all the accessories, lighting, and geek things, you can read more about it here.
Camera Settings
The basics of photography start with 3 simple yet important settings shutter speed (how fast the shutter closes and opens), ISO (how sensitive the sensor will be to light), and Aperture (control the depth of field and focus in the frame).
Shutter – lower numbers, more exposure = more light, and higher numbers mean less light, freezing the object.
ISO – Lower less noise and less light, higher more noise and more sensitive to light (usually for night shoots)
Aperture – lower numbers have less depth of field and higher numbers have more depth and focus through the image.
Best Settings:
Aperture – 8-11 will give you the sharpest point of your lens and focus back to the end.
ISO – 100 is best, 200-400 in newer cameras, and when you don’t have a choice, going over 400 will result in grain (noise), especially in darker scenes.
Shutter speed – 1/180 on a tripod and less or more depending on the need
White Balance – AWB (auto white balance) you can fix it in RAW.
Media Format – RAW (only)
How to choose the camera point of view
Scouting the project will allow you to understand the scope of work, vision, and craftsmanship through the in and out.
Only after you have been immersed in the experience of the client’s work we can set the point of view for each location.
There is no right or wrong here, in general, we will try to keep in most visuals an “eye-level” height that replicates other people’s points of view.
Working with different lenses will change the perspective and sometimes the point of view, we always ask ourselves what the purpose of the photo, the space, and what we want the viewer to see and whatnot.
In my mind, I always will determine a shoot based on the potential “client/viewer” they want to be, live, or work here. Do they understand what makes this space unique?

Architectural Photography Techniques
There are countless techniques to create a different style of visuals.
Basic – nothing is wrong with a basic, straightforward image of the space.
This technique is a single exposure (one image), that fits a different type of real estate and design work, it’s more “bright” and you can’t control the windows that are much brighter than the indoors.
Flash – This is similar to the basic technique, you add another light source to increase the interior light to match the outdoor light levels.
This can be on the camera bounced up or to the back of the room and/or with a separate flash to one of the sides.
HDR (High Dynamic Range) – This technique incorporates a minimum of 3 pictures in different exposures. Dark (that you can see the detail in the bright areas) normal and Bright (can see the details in the shadows).
The advantage of using this is that you can get more details by automatically blending the exposure that allows you to see the outside clearly and the exposure that eliminates the shadows in the door.
While this technique advanced in recent years, I won’t recommend nor practice using this method, as you get more details in the image but this is due to ambient (natural + other sources of light) that will impact the colors in the image.
Commercial Multi-Exposure – in this category you can do this in multiple ways, but the big idea is to create different pictures by selectively lighting different elements and blending them manually in post-production afterward.
This can be from 2 to 200 pictures depending on the complexity of the space and the size. It takes 5X-10X more time than any other technique both on the field and post-production, but it is damn worth it.
“You can’t do the same things and expect different results” is the best way to describe commercial work to all other techniques.
My personal preference is the multi-exposure technique, this is how I make sure I can control both ambient (natural) light and embellish it with studio lighting where needed.
Editing and Post Production
Only on this topic, I can write 10 pages, editing, and post-production are crucial parts of every visual artist out there, it is not about “changing the reality” it’s about compositing fantastic imagery and making it amazing.
There are several methods for editing an image and it depends on the level of work (commercial or not) and the type of project (real estate, design, hospitality, etc..).
Before we continue to talk about editing we must understand that we shoot to edit, and not the other way around.
The most popular and dominant post-production program is Adobe Photoshoot, there is almost nothing you can’t do with this software and you do need to master this concept to create polished images.
Photoshop allows you to do many things, including color correction, straightening images, cropping, colorizing, making it brighter or darker in selected areas, and much more.
The workflow depends on the style you capture the visuals.
Basic – Similar to what you can do today in every smartphone, crop, light, and color adjustments.
HDR – High Dynamic Range, Is a technique of combining 3+ different exposures to get a full range of data (black and white)
Hand Compositing – We can take any amount of visuals and manually blend them (layer them on top of each other) to create details and light/shadow in different areas of the image.
If you are a photographer, make sure you check Adobe’s reduced pricing packages.
They have discounted packages for both Photoshop and Lightroom so make sure you check them out
As a commercial photography studio, we only use our technique of hand compositing to make sure we can control all aspects of exposure, color, detail, and material.
Contracts
Making all terms clear at the beginning for both sides is crucial for the success of the relationship between all parties.
It is in everyone’s interest to avoid any confusion about pricing, licensing, the number of visuals, and any other details.
Keep in mind things like having all the project details, including time, date, address, and contact information.
Don’t forget to include deliverables, payment, licensing, property release, dispute, and of course singing at the end.
You can learn more about contracting tips here
Perfecting Your Craft
Work with the light – You need to be mindful of the sun’s direction and use it to your advantage, while you can create light direction with artificial light, using daylight is the most impactful for the exterior shoot.
Many apps can show you where the sun will rise and every time of the day until It sets.
Being mindful of the sun will allow you to control the framing to make the most of the sun’s direction lighting your object and creating even stronger images.
In general, the benefit of the sun being behind or to the side of you will result in a bluer Sky and avoid many light flares/glare (those circles of light created when light “hits” your lense.
This will also help you plan the day’s work with natural light.
Explore different angles – In general, we always want to be at the eye level of the viewer, I love straightforward visuals, but everything goes when you need to create the perfect picture.
Some angles are just perfect, you can’t re-invent the wheel when it works it works, but if you want to showcase a multi-dimensional that can help explain the space better go for it, just bear in mind for distortions and make sure all the lines are straight.
Look at the bigger picture – we talked about it before, ask yourself if can people understand the layout, maybe you want to hint there’s an outdoor space next to the kitchen or showcase a dining area next to the living room or kitchen.
Perfect with post-processing – you have many editing tools to perfect an image, make sure you use this tool to change rather than re-create.
In real estate, we don’t take off smoke detectors and blemishes as the images should represent what the buyers are receiving, while in commercial work we create an inspirational vision that needs to be perfected.
Some Useful Tips for First-Timers
- Don’t skip the tour of the space, understand the project scope, and plan accordingly.
- Give the client what they ask first, and be free spirit after you have completed the requirements for the project.
- Plan, and do a check-up for all equipment before you leave for the shoot, you will be surprised later if you don’t follow a checkup list before you hit the road.
- Be mindful of the weather, some shoots are rescheduled, while no one wants to reschedule a shoot, and some can’t be, but if it’s possible it’s better to come on a day that you can win.
- The camera height is recommended to be +/- eye level to give the view the same perspective.
- Extreme weather will impact your batteries’ lifetime so make sure if you work outside in the sun or snow have some spare batteries.
- Lens choice can be any Tilt-Shift lens or any other as long as you stay above 24mm to avoid lens distortion.
- Stop, think, and continue. Don’t go mechanic and run without stopping and checking with the client everything is ok, make sure your pictures are in focus and on point.
- Take care of yourself. Everyone wants unique and amazing images, but getting heart into the process will not help you or your clients. Think about where you walk and step. Be in mind precious artwork, sharp corners, stones, and anything that can you, your client, or their property damaged.
- For the memories. If you do new construction, make sure the toilet flush before you use it, many properties don’t have running water until the space is occupied (you will thank me sooner or later)
- Before you leave, wait with the small talk, review the images, tour the space, ask the client if they need anything else, and only then close it out for the day.
- One second before you step out of the door, is everything closed? Fireplace, windows, and doors? Did you forget anything behind?
FAQ – Frequently Asked Questions
- Should I incorporate people? Well of course you can, the question is why?
Does it help to explain the space? Does it give value? Will the person in the image be the focal point or the first thing people look at? I Don’t incorporate people, for the only reason that it distracts the viewer and focuses them on the human element and not the work itself unless it commercial lifestyle shoot. - What is the most important thing for a great picture? Light, as it helps create the mood and feel, without light you don’t have any detail, so focus on creating a directional light to make an impactful image.
Before and After
Attached below you can see the overwhelming difference between good architectural images on the left. (shoot as a single image at the same time)
And on the right is our final architectural image which includes over 100 exposures of ambient light, artificial lighting, and advanced post-production to create this award-winning photo that was published before millions of eyes.

About our work
Our studio specializes in both residential and commercial projects in Europe mainly in Germany, Denmark, Sweden, and France. with international experience across the Middle East, the US, and Asia.
From new construction, custom homes, community development, and landscape architecture to commercial and hospitality architecture.
Our goal is to create photos that sell, not only beautiful ones.
We take you to elevate you’re visuals to the next level and create the separation between you and the rest of the “pack”.
Recent Projects
Sun West Custom Homes (Villa Azul), SB Architects (Ascaya), Pinnacle Architects, Perelman Architects, SWABack (Ascaya Club House), CJ Hoogland, Lake Flato, B+A Architects, Novus Architecture, KTGY, and more.